
Barco ClickShare Integration Guide
This document serves as a comprehensive guide that outlines the steps required to integrate Barco ClickShare devices with the NetSpeek platform.
Prerequisites
Before beginning the integration, confirm the following:
- Your Barco ClickShare device is powered on and connected to the same network as your NetSpeek Edge.
- You have deployed a NetSpeek Edge client as described here: https://docs.netspeek.ai/netspeek-edge-installation-guide/
Step 1. Add Device to NetSpeek Room Canvas
Device Provisioning Flow
- In the NetSpeek Console, navigate to Room Management
- Select the room you wish to add your Barco device to
- Click Launch Room Canvas
- Click Add device to room
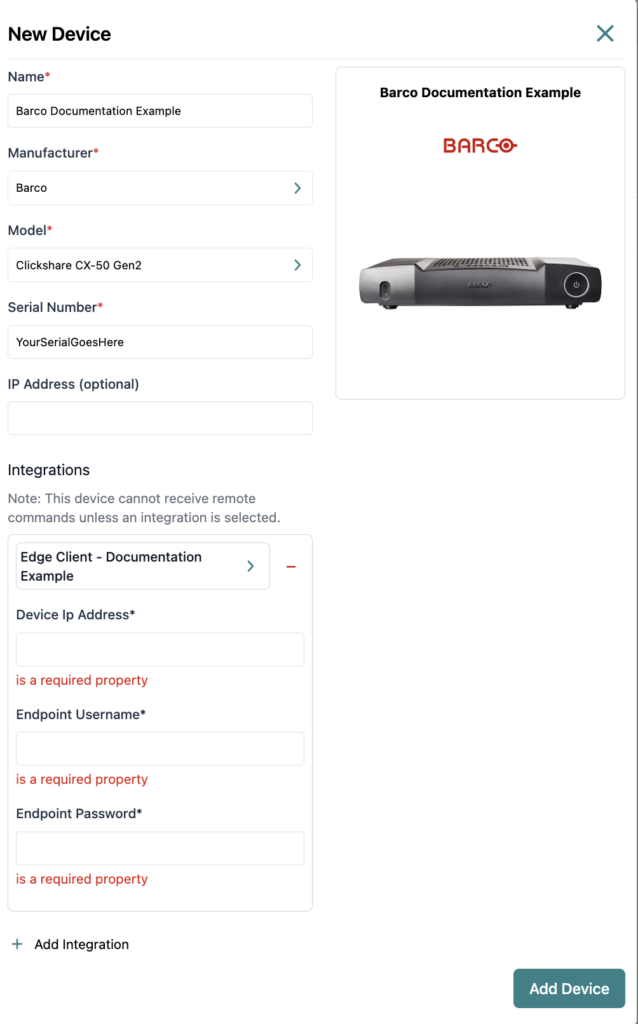
- Choose your desired device from the manufacturer → device model list.
- Configure the appropriate values, and in the “Integrations” section, select a previously created NetSpeek Edge VM integration. Ensure that the Edge VM is on a network that can reach the device’s configured IP address.
- In the configuration panel, enter the following fields:
- Serial Number
- Device IP Address (static/reserved IP, or DHCP)
- Endpoint Username
- Endpoint Password
Verification
Once the relevant settings described above are configured, to validate the integration:
- To validate the integration, select a Barco device in the NetSpeek console, open the Device Actions Tab, and select an available device action.It is generally advisable to test by dispatching a non-intrusive command such as a
Get Status. - On the device, observe the selected action occurring.
Troubleshooting
Connection Issues
- Confirm the IP address is correct and routable from the network segment where the NetSpeek Edge VM is deployed.
- Ensure the port used is not blocked by firewall rules on the machine running your NetSpeek Edge VM.
Support
If you run into any issues during onboarding or have questions, contact NetSpeek Support at support@netspeek.com.