
BrightSign Cloud Integration Guide
This document serves as a comprehensive guide that outlines the steps required to integrate BrightSign Cloud-registered devices with the NetSpeek platform.
Enabling NetSpeek Integration for BrightSign Cloud
Prerequisites
Before beginning the integration, confirm the following:
- BrightSign devices are already enrolled in BrightSign Cloud and connected to your organization.
- You have access to the BrightSign Cloud portal, signed in with an account that has permission to manage applications and API access.
Note
While app.bsn.cloud is commonly used for certain BrightSign device management tasks, all procedures related to APIs and applications for this integration should be performed in the BrightSign Admin Panel at https://adminpanel.bsn.cloud.
Step 1: Sign in to BrightSign Cloud
- Navigate in a web browser to the BrightSign Cloud admin portal.
- Sign in with an account that has permission to manage applications and API access.
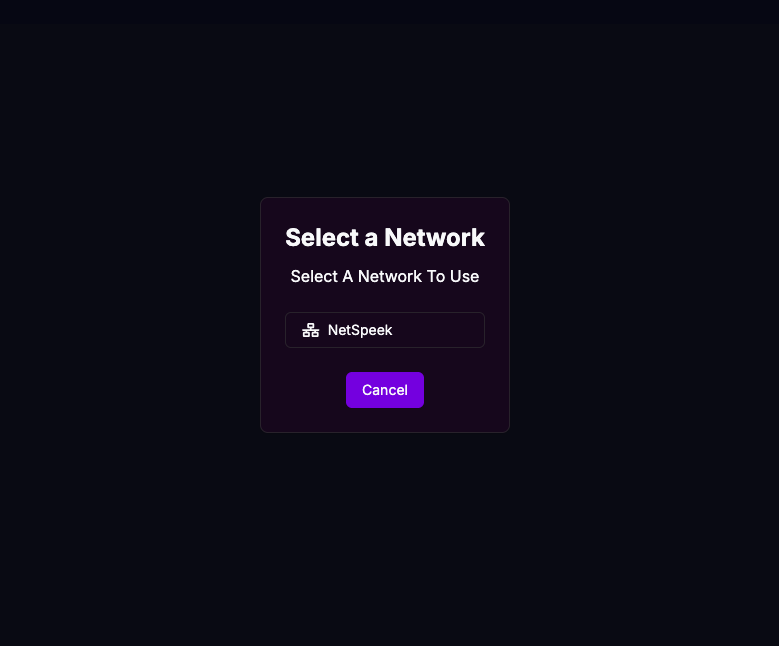
- Select the BrightSign Cloud “Network” containing the devices to be integrated
Step 2: Create an API Application
1. Navigate to your Account / Admin / Developer / Applications section (exact naming may vary by tenant).
2. Click Add Application.

3. Enter the required details (e.g., Application Name, Description).
4. You’ll then need be prompted to select desired permissions for the App. Below are screen captures of the required permissions that will need to be enabled in order for the NetSpeek integration to function properly (see details on permissions in the Resources section at the end of this document).
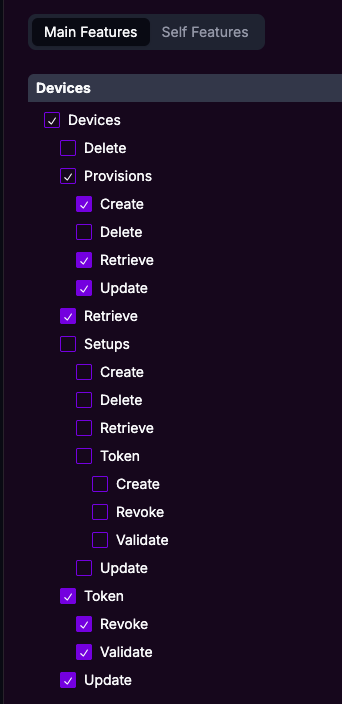
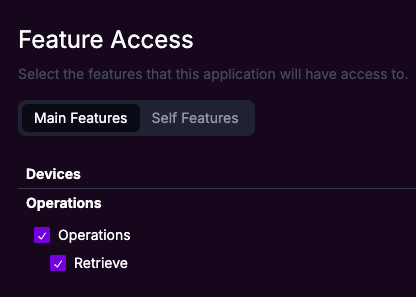
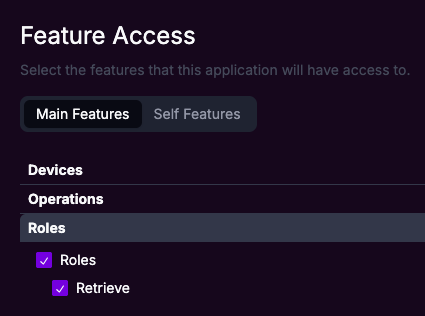
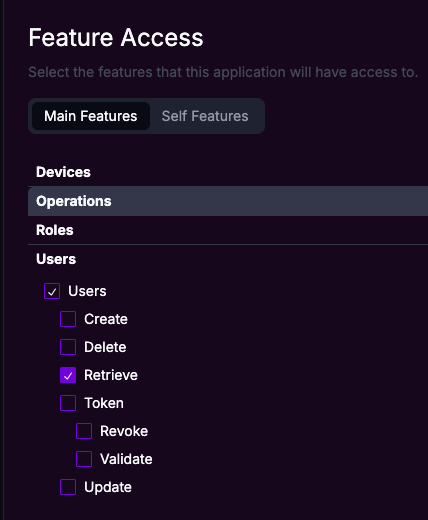
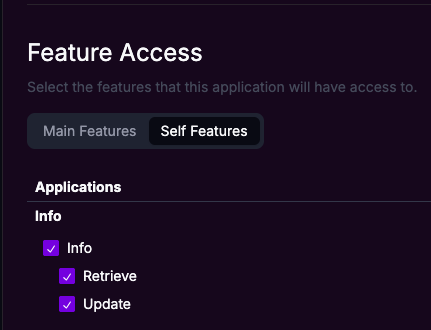
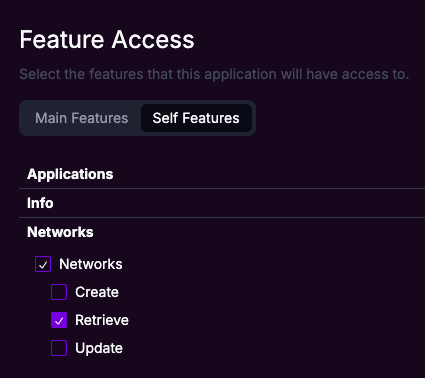
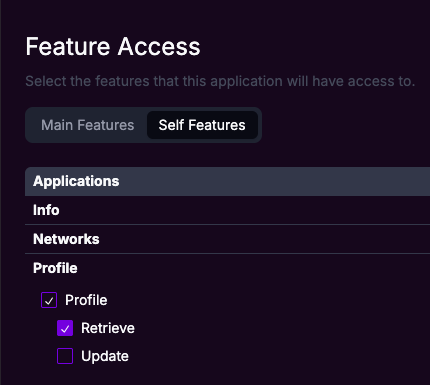
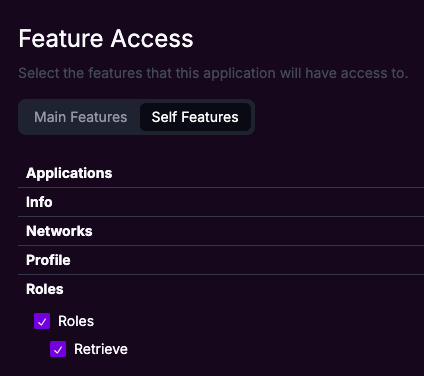
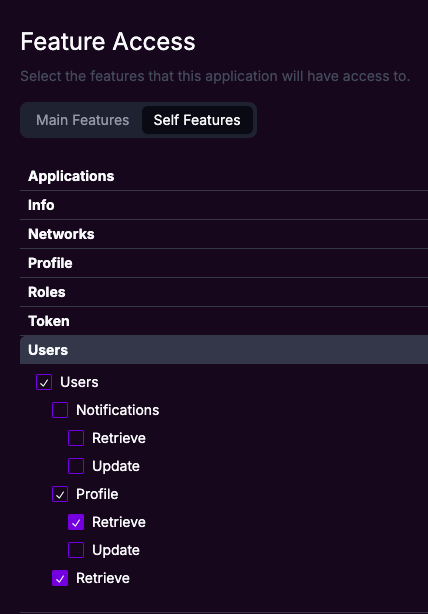
Once you’ve selected the required App Permissions shown above, Save the application.
Step 3: Retrieve Application Credentials
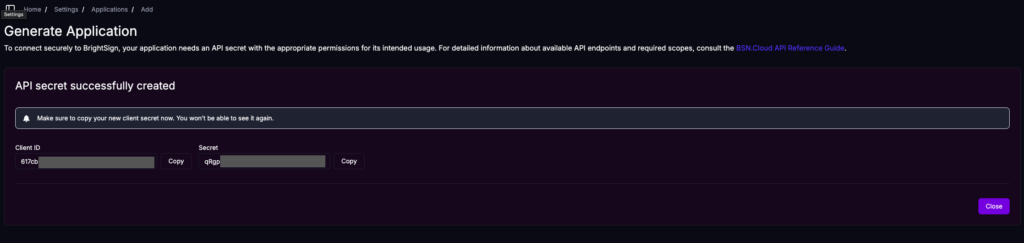
After creating the application you will be shown a page containing:
- Client ID
- Client Secret
- Copy/store the Client ID and Client Secret data according to your organization’s policies:
Note
The Client ID and Client Secret described above will be required when adding the integration to the NetSpeek platform.
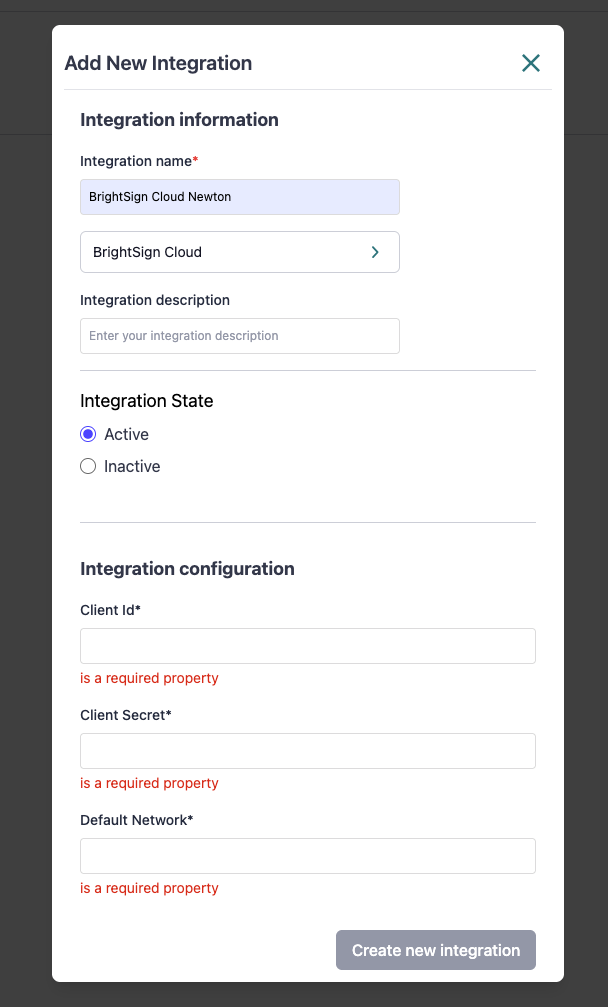
Step 4: Configure BrightSign Cloud in NetSpeek (Tenant Integration)
- In the NetSpeek portal, navigate to Tenant Management (settings cog icon)→ Integrations within your desired tenant (you may have access to multiple tenants / sub-tenants – if so, ensure you are configuring the integration in the proper place).
- Click “+ Add Integration”
- Enter an Integration Name (as an example format,
BrightSign Cloud – YourOrgName - YourTenantID). - Set Integration Type = BrightSign Cloud
- (Optional) Enter an Integration description, with details other NetSpeek users may need to know.
- Set Integration State = Active.
- Enter:
- Client ID: Paste the Client ID from Step 3
- Client Secret: Paste the Client Secret from Step 3
- Default Network: Enter your BrightSign Network name (what you logged into in Step 1)
- Click Save / Update Integration.
Step 5: Add Device to NetSpeek Room Canvas
- In the NetSpeek Console, navigate to Room Management
- Select the room you wish to add your BrightSign device to
- Click Launch Room Canvas
- Click Add device to room
- Choose your desired device from the manufacturer → device model list.
- Configure the appropriate values, and in the “Integrations” section, select the previously created BrightSign Cloud integration from Step 4.
- Serial Number – this is the only required configuration parameter. NetSpeek’s BrightSign Cloud integration uses the serial number of the device to interact with the BrightSign Cloud tenant.
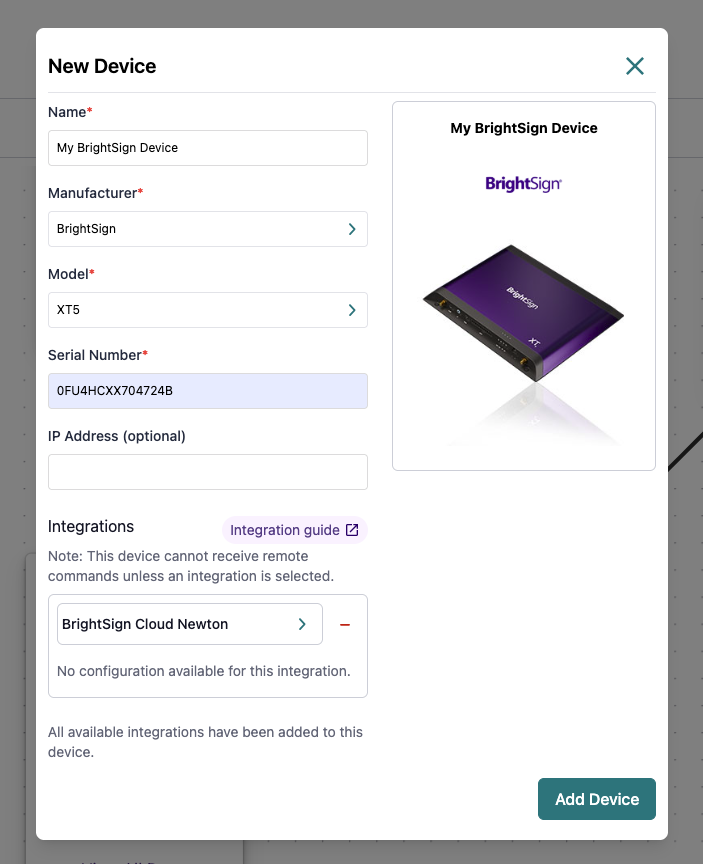
Verification
Once the relevant settings described above are configured, to validate the integration:
- Select a BrightSign device in the NetSpeek console, open the Device Actions Tab, and select an available device action. It is generally advisable to test by dispatching a non-intrusive command such as a
Get Status. - On the device, observe the selected action occurring.
Resources
Required App Permissions (Detailed Overview)
Main Features – Enabled Permissions
| Name | Permission Type | Description |
|---|---|---|
| Devices | Retrieve | Allows retrieving device lists and device metadata. |
| Devices › Provisions | Create | Required to provision/register new devices. |
| Devices › Provisions | Retrieve | Allows fetching provisioning details and status. |
| Devices › Provisions | Update | Enables modification of provisioning data during setup. |
| Devices › Setups › Token | Create | Required to generate tokens tied to device setups. |
| Devices › Setups › Token | Revoke | Allows invalidating setup-related tokens. |
| Devices › Setups › Token | Validate | Ensures setup-related tokens are valid for use. |
| Devices › Token | Revoke | Allows invalidating device tokens during lifecycle changes. |
| Devices › Token | Validate | Confirms device tokens are valid. |
| Devices › Token | Update | Allows modification of device token records. |
| Operations | Retrieve | Allows access to system or device operation logs. |
| Roles | Retrieve | Required to read available roles within the organization. |
| Users | Retrieve | Allows retrieving user information for authorization context. |
Self Features – Enabled Permissions
| Name | Permission Type | Description |
|---|---|---|
| Info | Retrieve | Allows reading the application’s own metadata. |
| Info | Update | Allows updating the application’s metadata or configuration. |
| Networks | Retrieve | Allows reading network metadata associated with the application. |
| Profile | Retrieve | Allows retrieving the application’s own profile information. |
| Roles | Retrieve | Allows checking the application’s own role assignments. |
| Users | Retrieve | Allows retrieving the authenticated user’s profile. |
| Users › Profile | Retrieve | Allows reading the user’s profile information. |
| Users › Token | Retrieve | Allows retrieving user token info for validation. |
Support
If you run into any issues during onboarding or have questions, contact NetSpeek Support at support@netspeek.com.