
Configure NetSpeek Edge with Static IP Address
This guide provides step-by-step instructions on how to configure a static IP address for the NetSpeek Edge VM when you’re connected to it via Terminal view in your Hypervisor (or via SSH, if enabled) for Edge VM version 1.1 or later. If you’re looking for the connectivity requirements the NetSpeek platform requires to external services and devices being orchestrated, visit: https://docs.netspeek.ai/onboarding-and-platform-usage/network-and-firewall-requirements/
Note
The instructions for older versions of the Edge VM (Beta6 and earlier) are linked at the bottom of the page. This document specifically and exclusively addresses the modern (version 1.1 and newer) Edge VM distributed as an Open Virtual Appliance package (in .ova format).
Determining whether to use static IP, DHCP, or DHCP Reservation for your NetSpeek Edge VM
Network administrators take different approaches to assigning IP address. Typically infrastructure or VM components like the NetSpeek Edge VM will be assigned a static IP address, which is the primary focus of this document.
However, some administrators may choose to use either DHCP (where the IP address assigned may change), or an approach known as DHCP reservation (where the IP address is assigned dynamically by a DHCP server at first, and then “reserved” semi-permanently for the device the IP was assigned to). The decision about how to assign and manage IP addresses within your network is controlled by your network administrator.
While NetSpeek expects most Edge VMs to be assigned static IPs, for installation convenience the Edge VM will request an address via DHCP upon bootup, unless a static IP has been configured. This introduction shows examples of what you will from see from an Edge VM’s settings when connecting to networks with and without DHCP services available.
Note that regardless of network connectivity, the Edge VM will present a login prompt in the Terminal view of your hypervisor. You must use the username and unique password for your VM instance in the Credentials CSV file downloaded from your NetSpeek portal – this is described in Step of the NetSpeek Edge Installation Guide. (Note that two credential types are provided in your Credentials CSV file – this prompt requires the SSH/Terminal login name and associated password, not the WebUI Passcode used in the Installation Guide.)
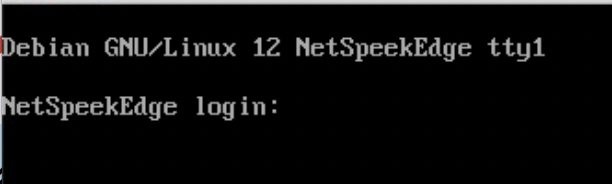
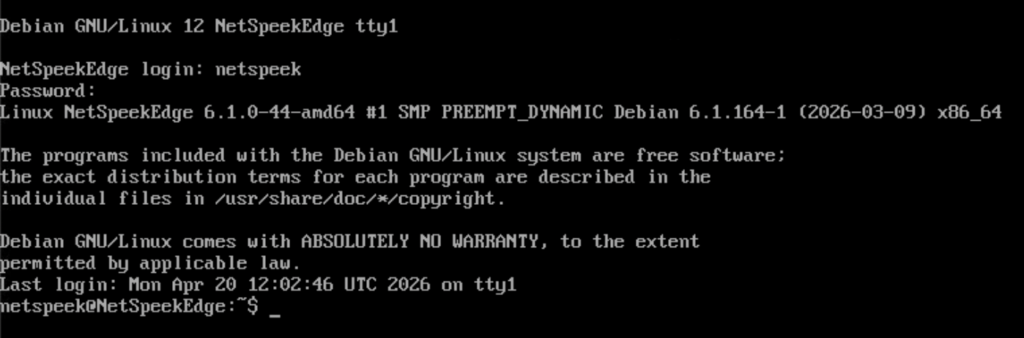
To determine if an IP address has been assigned, run the command ip a as shown in the two examples below.
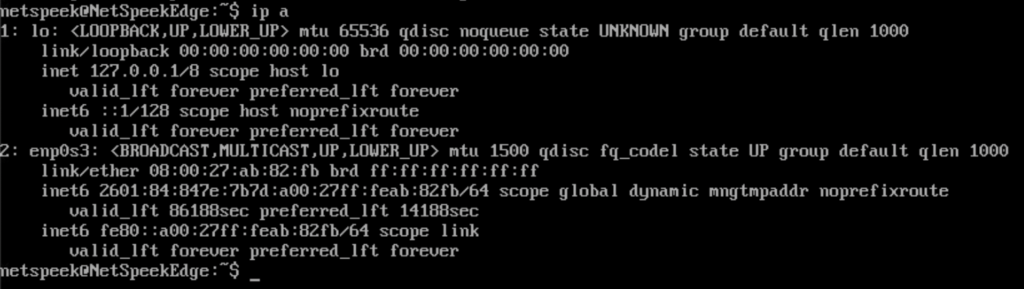
ip a command run while connected to a network with no DHCP server available. Note that other information about the VM’s network interfaces is provided, but there is no valid IP address assigned because the network hasn’t provided one, and this static IP procedure hasn’t been done yet.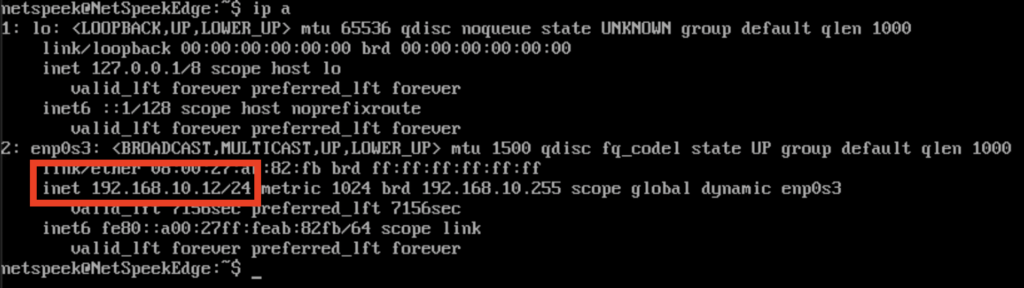
ip a command as above, but the network has an available DHCP server which assigned the IP address 192.168.10.12 to this Edge VM’s enp0s3 interface.Identify Active Edge VM Network Interfaces
You will first need to identify the VM’s active network interface(s) and then create a relevant configuration.
Run ip -c link show or ip a to find the name of your interface (commonly enp0s3 or ens18 or similar).

ip a command in the prior examples, and the ip -c link show command shown in the above image, indicate that the network interface on this Edge VM is labeled enp0s3 by the operating system.Create Configuration File For Active Network Interface:
This step will guide you through creating a new file in /etc/systemd/network/ with the file names’s typing ending with .network. Using a numeric prefix such as the way “10” is used in this example below (to identify an address in the 192.168.10.x network segment is being assigned), is optional but can help with recognition, and ordering in the event that multiple network assignments to different physical network connections are eventually desired.
Enter the following two commands (pressing Enter after each) on subsequent lines of the command prompt:bashsudo -i
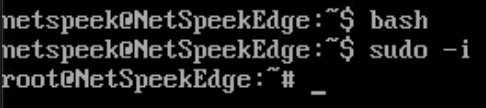
sudo changes the level of access you have to the Edge VM (prior to sudo, the “NetSpeek” user, afterward the OS root)Enter the following command or similar (replacing 10 with your desired number, or omitting the number, per your preference) and press Enter:
nano /etc/systemd/network/10-static.network
The nano file editor program opens, and you are working in a file with the name given in the command above. Add the following, replacing enp0s3 with your adapter name if necessary (paying close attention to number 0 vs letter O distinctions in interface name) and replacing the network connectivity details with appropriate IP address, gateway, and DNS information for your network. Scroll down to see an example image of the nano editor with this example configuration entered.
[Match]
Name=enp0s3
[Network]
Address=192.168.10.5/24
Gateway=192.168.10.1
DNS=8.8.8.8
DNS=1.1.1.1
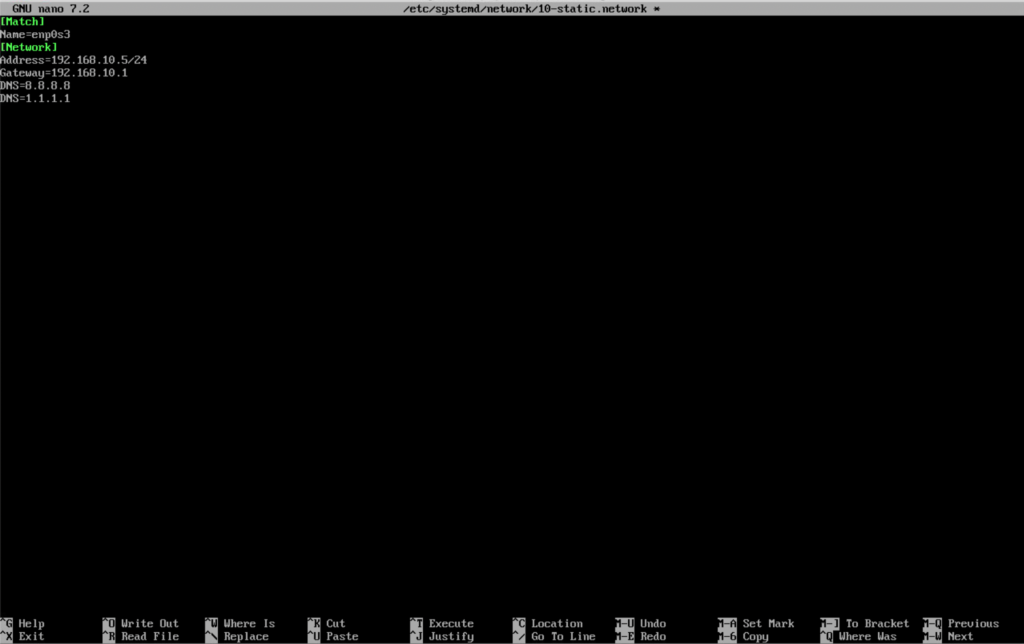
Press CTRL + O (note this is letter O) followed by Enter to save (what nano calls “Write Out”) the file:
Note
The first action is to press and hold the CTRL (or Control) key and subsequently press the letter “O”, then the nano editor will display/confirm the current filename at the bottom of the screen, as depicted in the image below. Release Ctrl and O, and then press Enter or Return to confirm the filename and save your changes, as shown in detail in the next step.
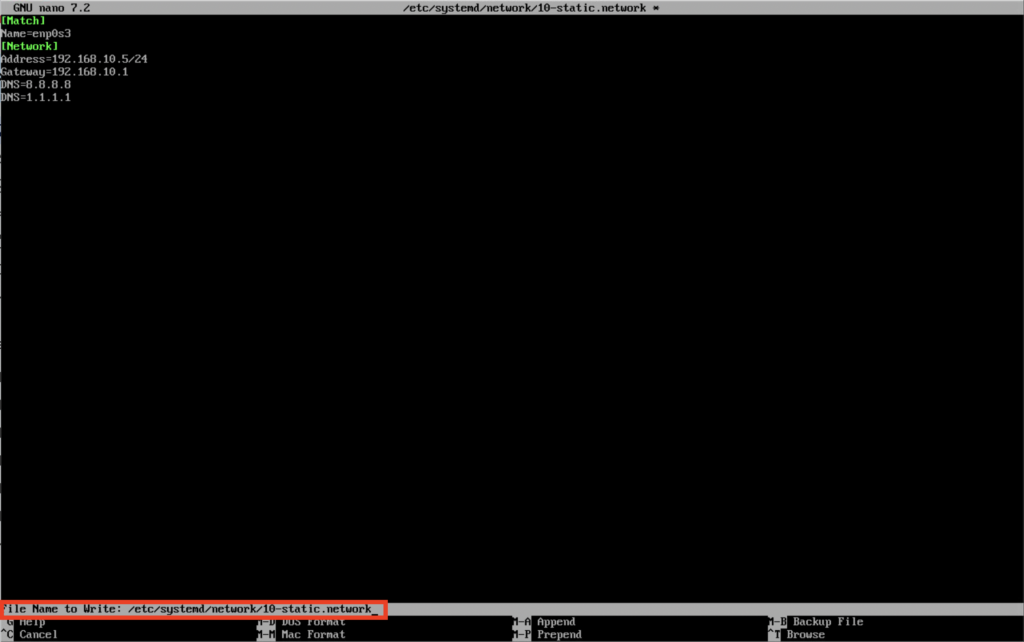
CTRL + O has been pressed – see the highlighted area at the bottom of the window where nano confirms the name of the file you’re about to save this network configuration to.
Enter has been pressed – see the highlighted area (in red at the bottom of the interface) where nano confirms the number of lines of configuration written into your file. You may not also that the asterisk (*) present in the top area of the nano window displaying the filename is no longer present – the asterisk indicates the file has unsaved changes, and this step saved/committed those changes.Press CTRL + X to exit nano and return to the command line.
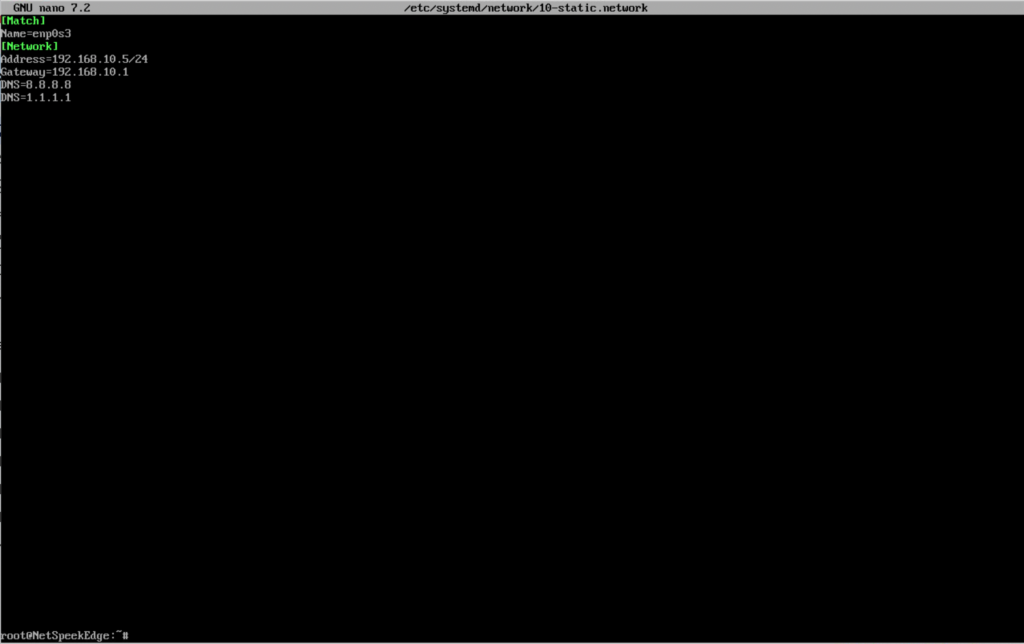
CTRL + X has been pressed, exiting nano and returning to the command line as root (see lower left of the image)Restart Networking Services to use the new configuration
The configuration is in place in a properly saved file, but is not being used by the Edge VM yet. After the interface is configured according to the preceding steps, the VM’s network service must be restarted with the command below before the new network configuration will be utilized. (Note, this does not restart the entire Edge VM operating system, only the networking services within it.) The command to enter is:
sudo systemctl restart systemd-networkd.service
Note that the example image shows two commands run separately on successive lines. The first is the restart of the “network daemon” via the command above, and the second is the same ip a command from prior steps, used here to verify the configuration entered in nano in the prior steps is now governing the network connection the Edge VM is using.
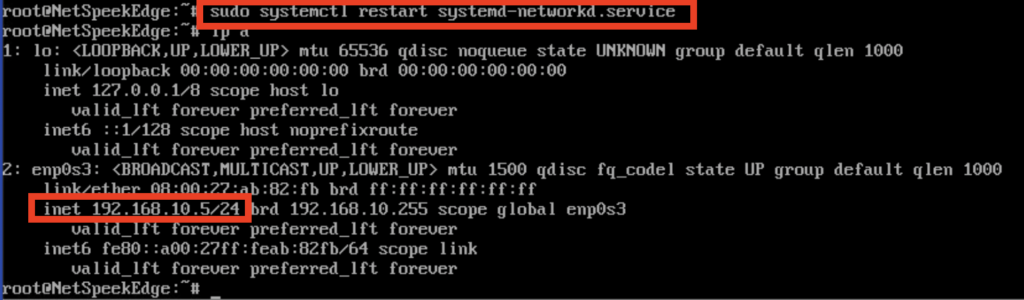
ip a command’s output of the IP address in the lower red highlighted area shows the previously configured network information is now being used by the VM.Verify connectivity and test configuration resiliency (optional)
You may wish to verify network connectivity is operational at the newly configured IP address by accessing the Edge VM’s local webpage. To this do, from the browser of a PC with network access to the new Edge VM IP address, navigate to: http://<vm-ip>:8080 noting that HTTP (not HTTPS) is, used and the port 8080 must be specified.
Note
If your browser defaults to HTTPS (which is certificate-secured connections to websites), you will need to manually specify an HTTP URL, including the port 8080, precisely as described in the example above. The NetSpeek Edge VM does not support HTTPS connections to the web UI in order to avoid browser compatibility problems with self-signed certificates.
Taking the HTTP and port 8080 requirements together to construct a URL, to access a VM assigned the address 192.168.10.5 in our example, the login URL would be:
http://192.168.10.5:8080
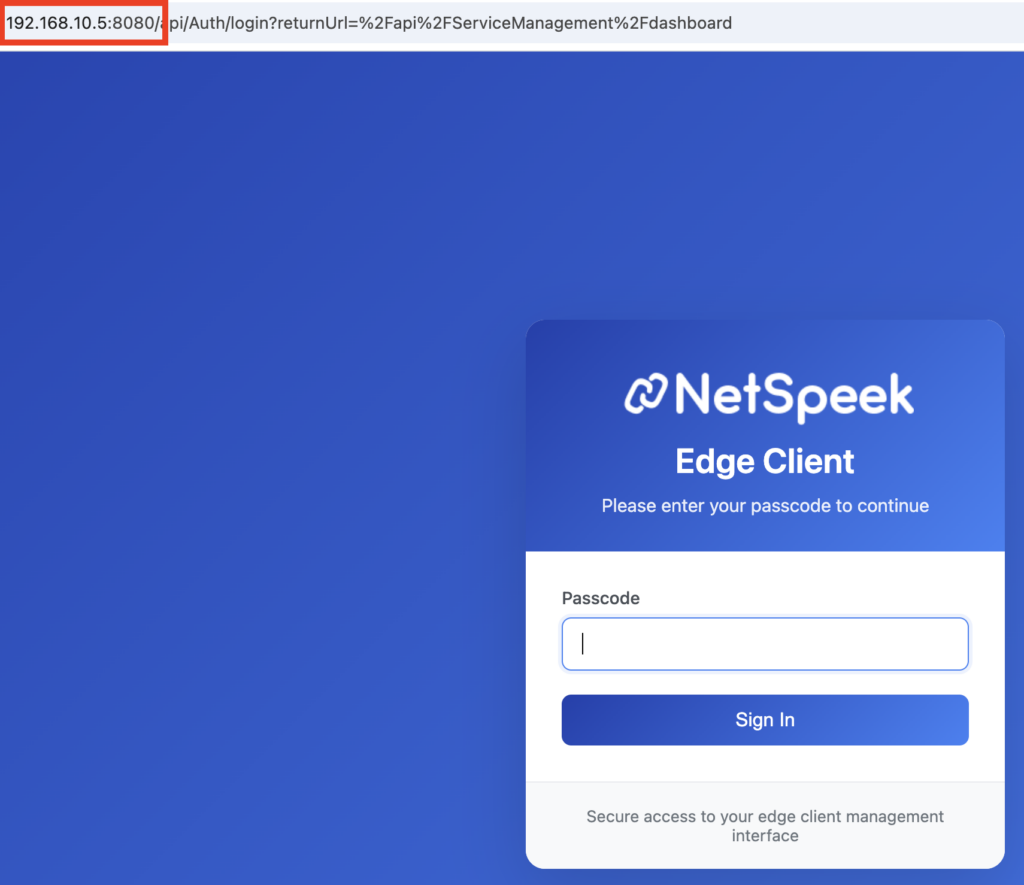
You may wish to test the resiliency of this configuration by rebooting the Edge VM, and/or the physical host and hypervisor the VM is running on, to simulate power loss and recovery, and ensure the Edge is still accessible and the etc/systemd/network configuration file is still intact afterward.
This guide is for Edge VMs version 1.1 and later, distributed as .OVA files. The procedure is different than in previous Edge VM versions – this document describes editing files in the /etc/systemd/network file path, whereas older Edge VMs held this configuration in /etc/network/interfaces.
Prior instructions (for the legacy pre-OVA Edge VM, version Beta6 and earlier) are found here: https://docs.netspeek.ai/archive/legacy-netspeek-edge-documentation/configure-legacy-netspeek-edge-with-static-ip-address/
Support for pre-OVA Edge VMs has been deprecated by NetSpeek, and we strongly encourage the replacement of any older Edge VMs with a modernized OVA-packaged VM as described in NetSpeek Edge Installation Guide.