
Neat Pulse Integration Guide
This document serves as a comprehensive guide that outlines the steps required to integrate a Neat Pulse tenant with the NetSpeek platform.
Note
As of NetSpeek’s platform version 1.9 release in July 2026, the method of configuration for devices orchestrated through Neat Pulse has changed.
- Neat devices are now identified by serial number rather than their Neat Pulse device ID, for ease of use and reliability reasons. Make sure your Neat endpoints have their accurate serial number as part of their configuration.
- Neat devices without a configured serial number will continue to use their Neat Pulse device ID as the fallback – though please note that NetSpeek intends to deprecate the ability for users to configure Pulse device IDs in Q4 2026, at which point serial number will be the only permitted method of configuration.
Prerequisites
Before beginning the integration, confirm the following:
- Neat devices are powered on, connected to the network, and registered to your Neat Pulse tenant.
- You have Owner access to your Neat Pulse tenant, in order to manage API Keys (Neat documentation: Managing Neat Pulse Users).
- Your Neat Pulse tenant is on a paid plan with access to the Neat Pulse API.
- You have access to your NetSpeek tenant with permission to manage Integrations.
Step 1: Prepare the Neat Pulse Environment
The Neat Pulse documentation guides the Neat device administrator through the various steps of tenant orchestration, such as managing users, configuring location hierarchy, and enrolling devices. This NetSpeek guide assumes these Pulse readiness steps have been completed, and that Neat devices are enrolled and operational in Neat Pulse.
Create an API Key in Pulse for use in the NetSpeek integration
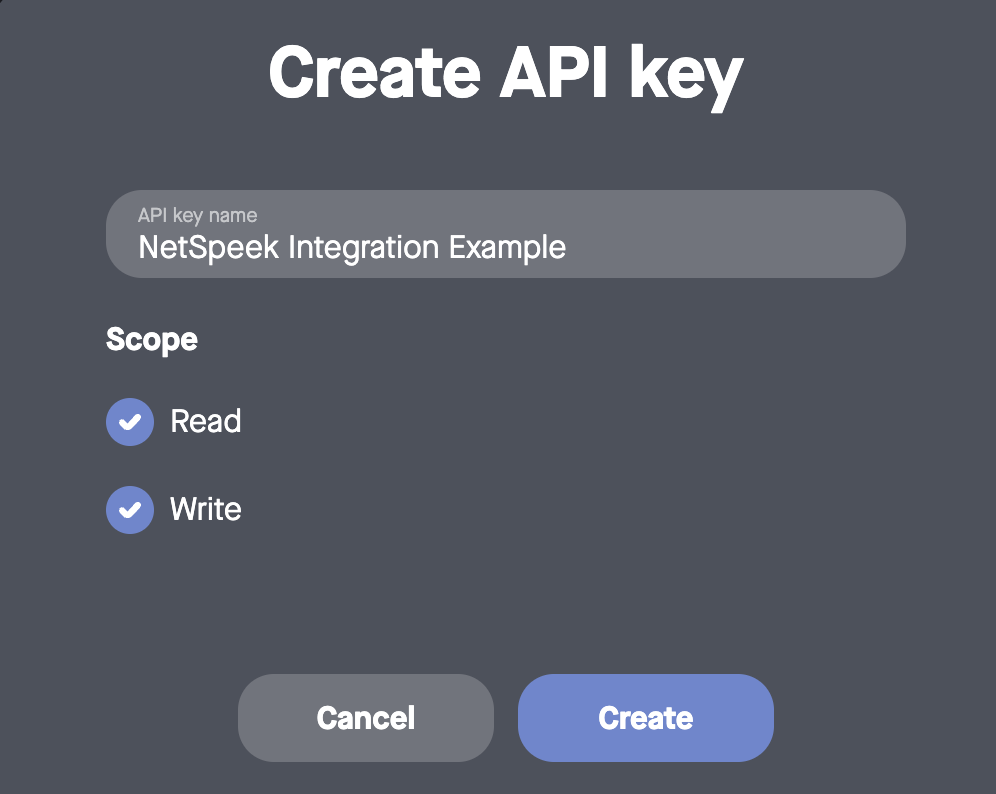
In Neat Pulse, navigate to Settings → API Keys and click “Create API Key”

In the interface to create an API key, give the key an identifiable name, and ensure the Scopes of both read and write are enabled (this is necessary for NetSpeek to fully orchestrate Neat devices, including the use of control commands).
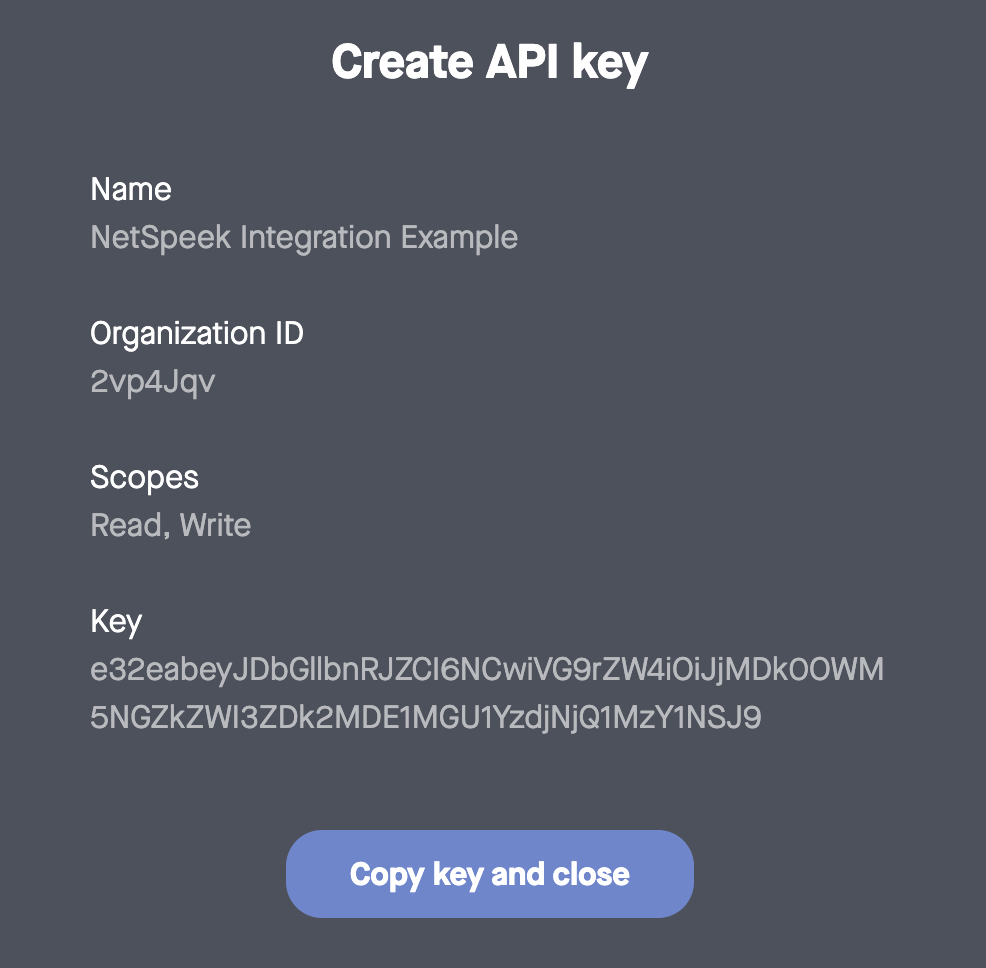
In the following screen, you are shown a confirmation of the key’s creation and given the opportunity to copy the key and close the window. Store the key according to your organization’s policies – as shown in the next image, the key will not be fully visible again after this step.
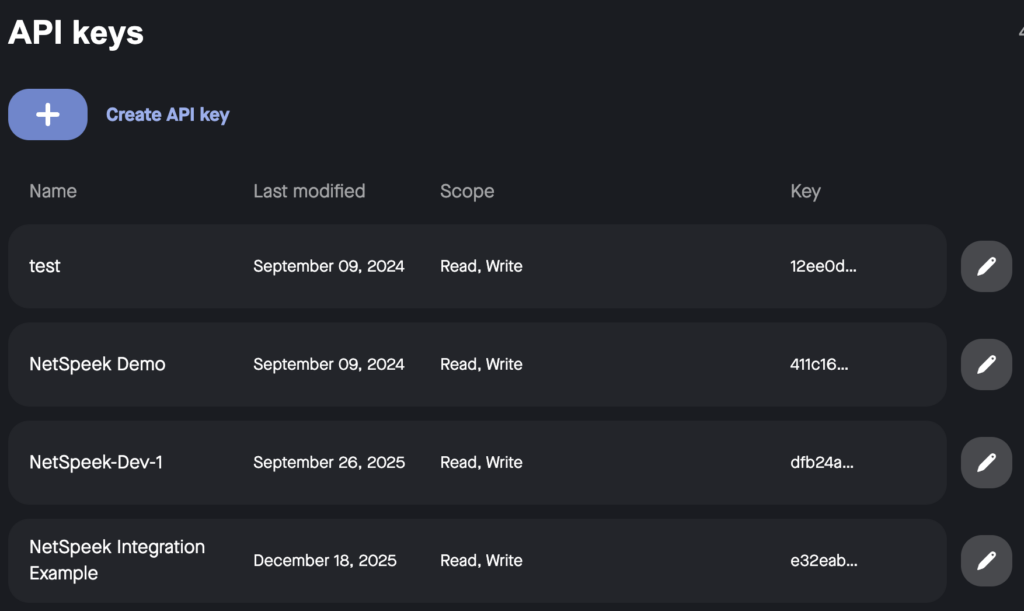
Note that in the image below, only the first few characters e32eab are shown, and the full key from above is no longer visible. You will need the full key to paste into the NetSpeek interface in Step 2.
Step 2: Configure Neat Pulse in NetSpeek (Tenant Integration)
- In the NetSpeek portal, navigate to Tenant Management (settings cog icon)→ Integrations within your desired tenant (you may have access to multiple tenants / sub-tenants – if so, ensure you are configuring the integration in the proper place).
- Click “+ Add Integration”
- Enter an Integration Name (as an example format,
Neat Pulse – YourOrgName - YourTenantID). - Set Integration Type = Neat Pulse
- (Optional) Enter an Integration description, with details other NetSpeek users may need to know.
- Set Integration State = Active.
- Enter your Organization ID and API Key.
- The Organization ID is also known as your Neat Pulse tenant identifier. The API Key is created in your Pulse tenant’s settings as described in the prior step, to allow an external application (in this case NetSpeek) to connect to your Neat devices. For more details on these topics, see Neat’s API management documentation.
- Click Create new integration / Update integration.

Step 3: Gather Serial Numbers from Pulse-Enrolled Devices
1. In the Neat Pulse Dashboard, use hierarchy navigation or filters to create a view containing the device(s) you want to onboard into NetSpeek.

2. Open the Settings (three dots) menu → Export CSV.

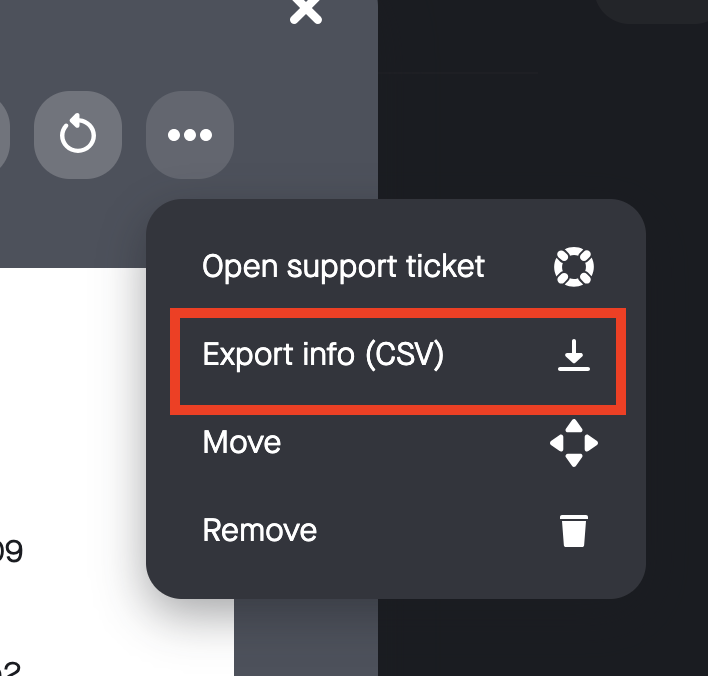
This procedure is shown in this example for a single room with two hardware devices (Neat Bar and Neat Pad) but the csv file export can be applied as a bulk action to rooms with more devices.
3. Open the CSV file and copy the Serial Number of the device you want to onboard.

A previous version of the Neat Pulse integration with NetSpeek used the Pulse ID (aka “device ID”) value; as described in the next step, NetSpeek has transitioned to Serial Number values for Neat device configurations and will be deprecating the use of Pulse ID / device ID in Q4 2026.
Note also that the Pulse export provides many data points about the devices – ensure the Serial Number value is configured in NetSpeek.
Step 4: Add Device to NetSpeek Room Canvas
- In the NetSpeek Console, navigate to Room Management
- Select the room you wish to add your Neat Device to
- Click Launch Room Canvas
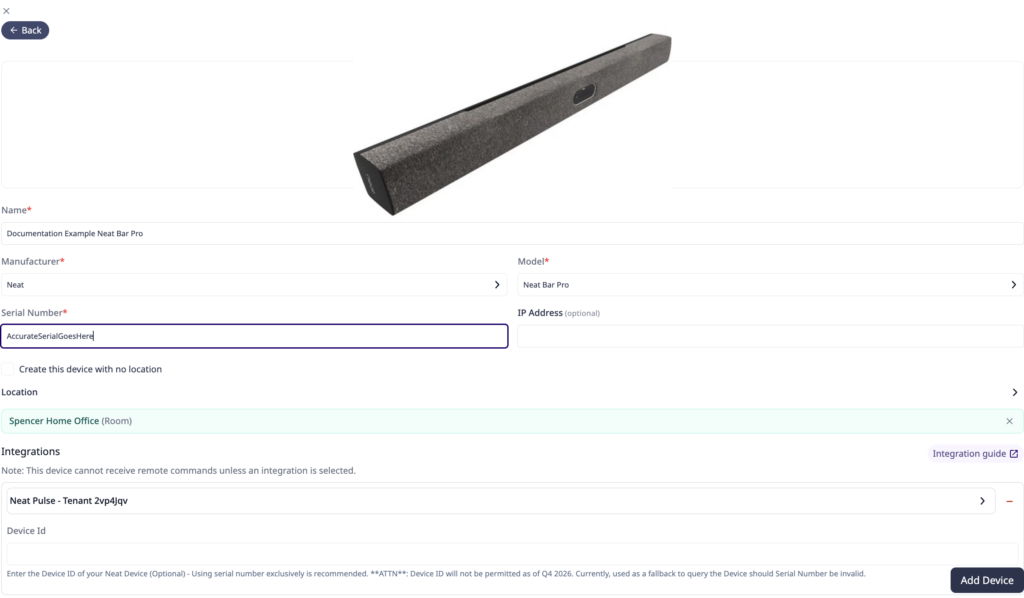
- Click Add device to room
- Choose your desired device from the manufacturer → device model list.
- Configure the appropriate values, and in the “Integrations” section, select the previously created Neat Pulse integration from Step 2.
- Configure the Serial Number of the device.
Note
For rooms with multiple Neat hardware components, the serial number value will need to be added individually to NetSpeek for each hardware item. In this example, this means that the Neat Pad with serial number ending 0569 must be added and saved, then a new device must be added to the NetSpeek Room Canvas for the Neat Bar with serial number ending 0304. For rooms with additional peripherals such as Neat Centers, multiple Neat Pads, or Neat Boards acting as companion systems, all hardware devices must be configured into the NetSpeek Room Canvas with their individual serial numbers.
Verification
Once the relevant settings described above are configured, to validate the integration:
- Select a Neat device in the NetSpeek console, open the Device Actions Tab, and select an available device action. It is generally advisable to test by dispatching a non-intrusive command such as a
Get Status. - On the device, observe the selected action occurring.
Support
If you run into any issues during onboarding or have questions, contact NetSpeek Support at support@netspeek.com.