
Netgear Integration Guide
This document serves as a comprehensive guide that outlines the steps required to integrate Netgear AV switch devices with the NetSpeek platform.
Note
As of this publication (at the release of NetSpeek platform version 1.16) Netgear M4250- and M4300-series switches are supported. See the Netgear section of NetSpeek Supported Devices and Controls for the full current list of supported devices and commands for this Connector.
Prerequisites
Before beginning, confirm the following:
- Your Netgear switch is powered on and connected to a network that is routable to/from your NetSpeek Edge VM.
- You have deployed a NetSpeek Edge VM as described here: https://docs.netspeek.ai/netspeek-edge-installation-guide/
- Note: This connector requires an Edge VM running software version
1.6.0or later.
- Note: This connector requires an Edge VM running software version
Terminology change, October 2026
The device and tenant level “Connector” configurations were previously called “Integration” and have been renamed in both the NetSpeek portal interface, and NetSpeek Docs.
- The switch is running firmware version
13.0.5.26or later.- NetSpeek validated this connector at initial release with the M4250 firmware version above running ConfigAgent API
2.0.0.112.
- NetSpeek validated this connector at initial release with the M4250 firmware version above running ConfigAgent API
- You have a user account configured on the switch available for NetSpeek’s use. We recommend a dedicated account for NetSpeek only, for audit-ability and account revocation workflows.
- The NetSpeek Connector signs in with this account and keeps the session open perpetually.
- If someone signs out of this account from another connection, the NetSpeek Connector’s session ends. NetSpeek’s Connector then signs in again automatically.
- If you will use actions that modify the switch’s configuration (for example, Change Port Settings), the account must have relevant permissions in Netgear.
Step 1. Add Device to NetSpeek Room Canvas
Device Provisioning Flow
- From a new WorkSpace, select Locations and search for or navigate to the Room the device will reside in.
- For an infrastructure device like a network switch, this is commonly an infrastructure closet, IDF, or similar space that may not be a traditional “room” or conferencing space.
- Attaching infrastructure devices to the NetSpeek location hierarchy above the Room level (eg defining a switch at the floor, building, or campus level) is a planned feature but not currently available. For now, create a Room in the NetSpeek hierarchy with a descriptive name, and place your infrastructure device(s) in the Room.
- Select the room you wish to add your Netgear device to
- The Room Canvas opens by default.
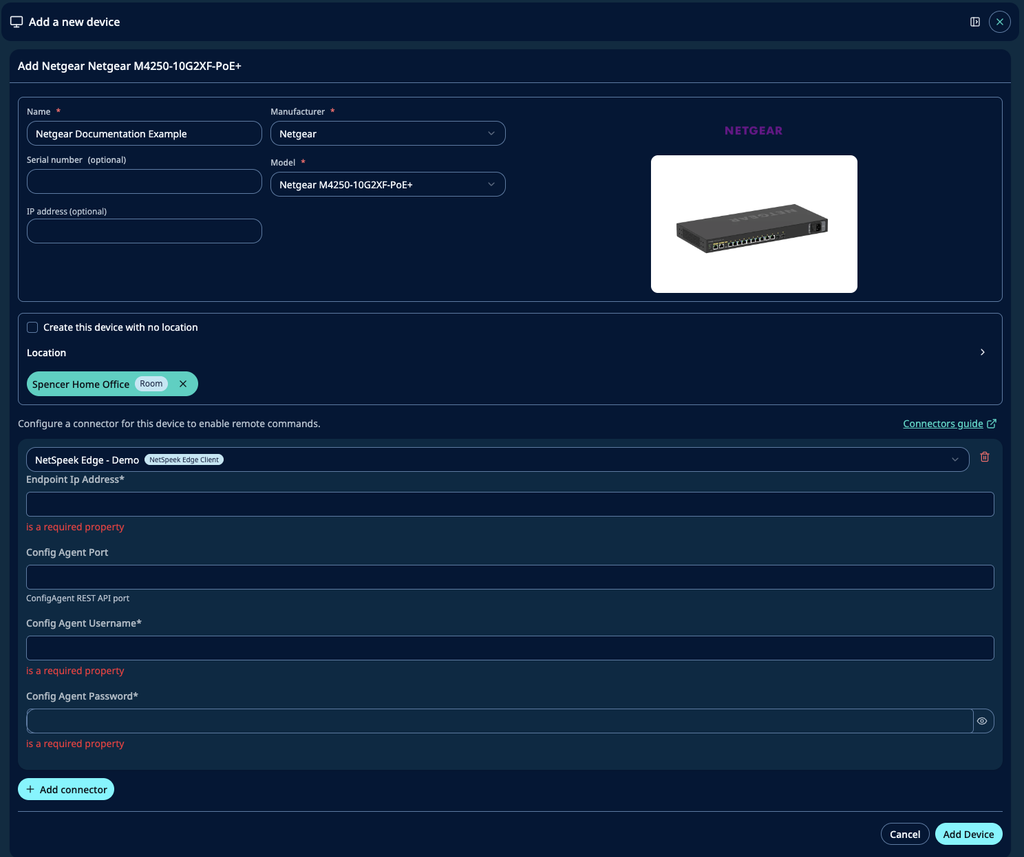
- Click “Add Devices” and then “Create new“
- Choose your desired device from the manufacturer → device model list.
- Configure the appropriate values, and in the “Connectors” section, select a previously created NetSpeek Edge VM Connector. Ensure that the Edge VM is on a network that can reach the device’s configured IP address.
- In the configuration panel, enter the following fields:
- Endpoint IP Address (required): the management IP address of the switch (static/reserved IP recommended).
- Config Agent Port (optional): the HTTPS port of the ConfigAgent REST API. Leave it empty to use the default port 8443. Enter a value only if the ConfigAgent REST API on your switch uses a different port.
- Config Agent Username (required): the switch user account for NetSpeek.
- Config Agent Password (required): the password of the account aboce.
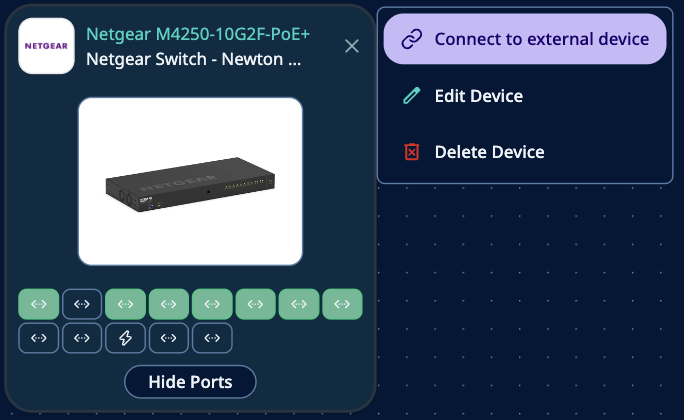
Switch ports on the Room Canvas
- Each data port has the same number as on the switch front panel (for example, ports 1 to 26 on an M4250-26G4F-PoE+).
- Copper ports are Ethernet ports. Uplink ports are SFP or SFP+ ports, depending on the model.
- The power input is named POWER. You can connect it to a PDU outlet.
- Cabling connections can be made to devices in other spaces via the “Connect to external device” workflow. On any Canvas, show/hide devices outside the current location with the toggle at the upper left on the Canvas.
Verification
Once the relevant settings described above are configured, to validate the Connector:
- Select a Netgear device in the NetSpeek console, open the Device Actions Tab, and select an available device action. It is generally advisable to test by dispatching a non-intrusive command such as a
Get Statusor retrieving Switch Name and Location (in the Device Info group) - On the device, observe the selected action occurring.
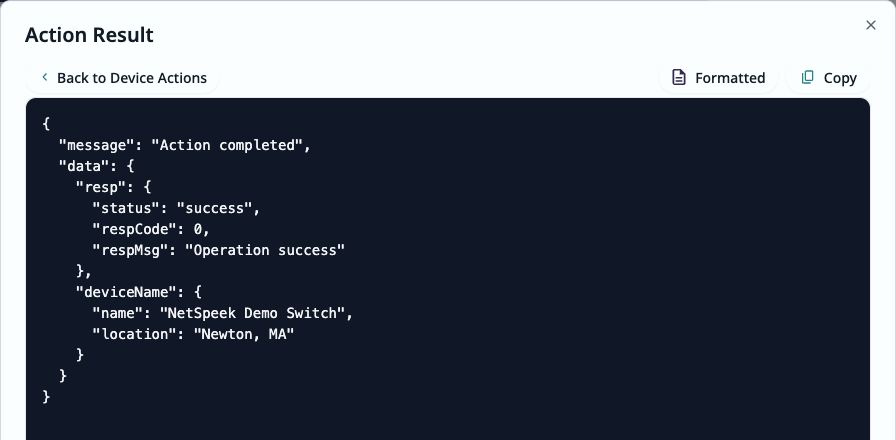
- Or, when the action completes, a notification in the NetSpeek portal interface shows Completed. Click View Details to open the Action Result.
- For example, a successful Switch Name and Location command shows
"status": "success"and the name and location configured on the switch as shown in the image below.
Note
Save changes to keep them after a reboot
Actions that change settings (for example, Change Port Settings or Set Switch Name and Location) change the running configuration of the switch but are not stored, so the switch loses these changes when it restarts unless you save them:
- Run Unsaved Changes to see the differences between the running configuration and the startup configuration.
- Run Save or Copy Configuration with the parameter
rtosto save the running configuration to the startup configuration.
Troubleshooting
Network / Connectivity Issues
- Confirm the IP address is correct and routable from the network segment where the NetSpeek Edge VM is deployed.
- Ensure TCP 8443 (or the port you entered in Config Agent Port) is not blocked by firewall rules on the machine running your NetSpeek Edge VM or on the network between the Edge VM and the switch.
TLS / Certificate Errors
- The switch uses a self-signed certificate on its HTTPS port. The connector accepts this certificate.
- If TLS errors continue, check that no device between the Edge VM and the switch inspects or replaces TLS traffic.
Authentication Failures (401 or 403)
- A NetSpeek session on the switch is valid for 24 hours. The connector renews it 1 hour before it expires.
- If the session ends earlier (for example, the account was signed out in another place), the connector signs in again and retries the action once.
- If authentication failures continue, verify the username and password, and confirm that the account is not locked or disabled on the switch.
Changes Are Lost After a Reboot
- Changes made with NetSpeek actions apply to the running configuration. Save them as described in the note under Verification.
Switches with NETGEAR Engage AV Profiles
- Save or Copy Configuration works on the switch configuration files. A copy made with this action (for example, to the backup configuration) does not include the AV profile data that NETGEAR Engage manages. If you restore such a copy, the AV profiles are lost.
- Use NETGEAR Engage to back up switches that have AV profiles.
Support
If you run into any issues during onboarding or have questions, contact NetSpeek Support at support@netspeek.com.
© NetSpeek Inc. 2026