
NetSpeek Lena Onboarding Guide
Who is Lena?
NetSpeek’s Lena is the world’s first Language Enabled Network Administrator designed specifically for managing complex, multi‑vendor Pro AV (professional audio/video), UC (unified communications) and digital signage systems.
Key Features
- Device Onboarding, Installation & Organization
Simplify deployment, configuration, and organization of your Pro AV devices for scalable, efficient management. - Intelligent Remote Monitoring & Control
Solve problems, execute commands, and administer your AV network from anywhere. - Enterprise-Grade Security & Compliance
Role-based access, secure protocols, and compliance with security standards.
Getting Started with NetSpeek
This guide walks you through a step-by-step setup of the NetSpeek platform, from account activation to setup and initial use.
1. Account Activation (Required)
- You will receive an email invitation from NetSpeek.
- This invite will come from
donotreply@netspeek.com– please ensure that delivery from that address is permitted to users being invited. - The invite is valid for 48 hours. If the invitee does not claim their account within this timeframe, press the button next to that user’s name to re-send their invite.
- This invite will come from
- Click the invitation link to begin setup.
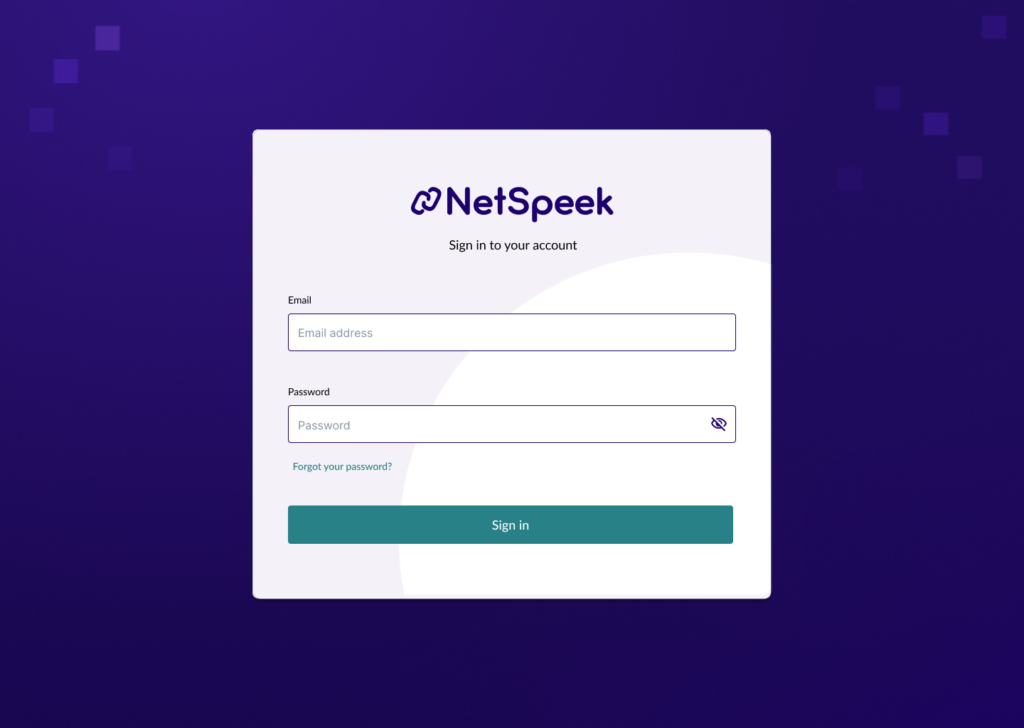
- You’ll be redirected to the NetSpeek login portal.
- Create a password for your account.
- Sign in with your new credentials (email + password).
- Review and accept the Terms of Service and Privacy Policy.
- You’ll be logged into the portal, viewing the tenant you’ve been invited to, and with the permissions configured for your user account.
2. Invite / Manage Users
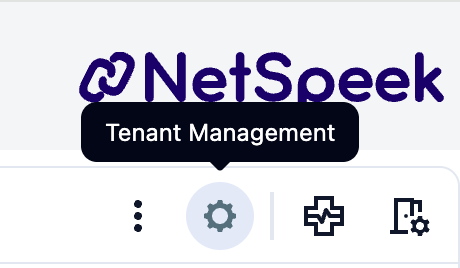
- Navigate to Tenant Management – this is a cog icon found in the upper right of the portal interface, beneath the NetSpeek logo.
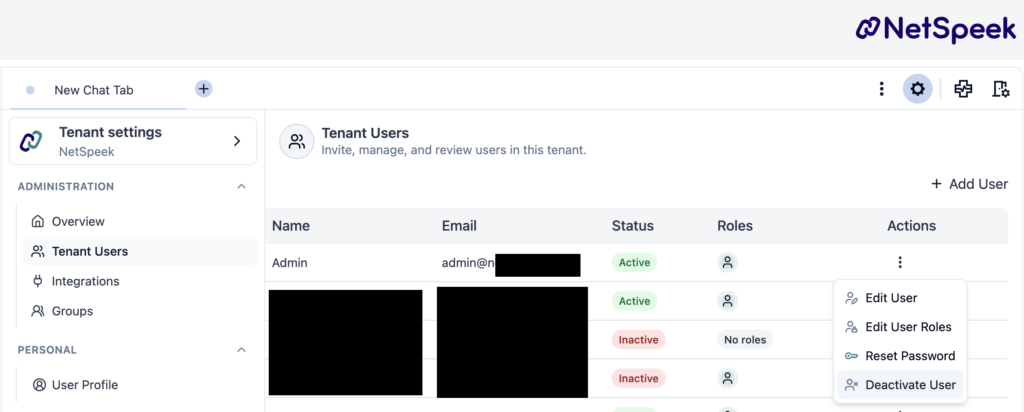
- Select Tenant Users – in this interface, with relevant permissions, you can create/invite new users to the tenant (via the “Add User” button), or administer existing user accounts with functions like editing the user, the user’s role, resetting the password, deactivating the user, or for inactive/unclaimed accounts, resending the activation email (for example, if the account was not claimed within 48 hours of the initial invitation).
Note
Role Based Access Control enables assigning users functionally-specific roles – read more about these roles, their permissions, and managing role assignment in bulk via Groups, at: Role-Based Access Control (RBAC) Implementation Guide.
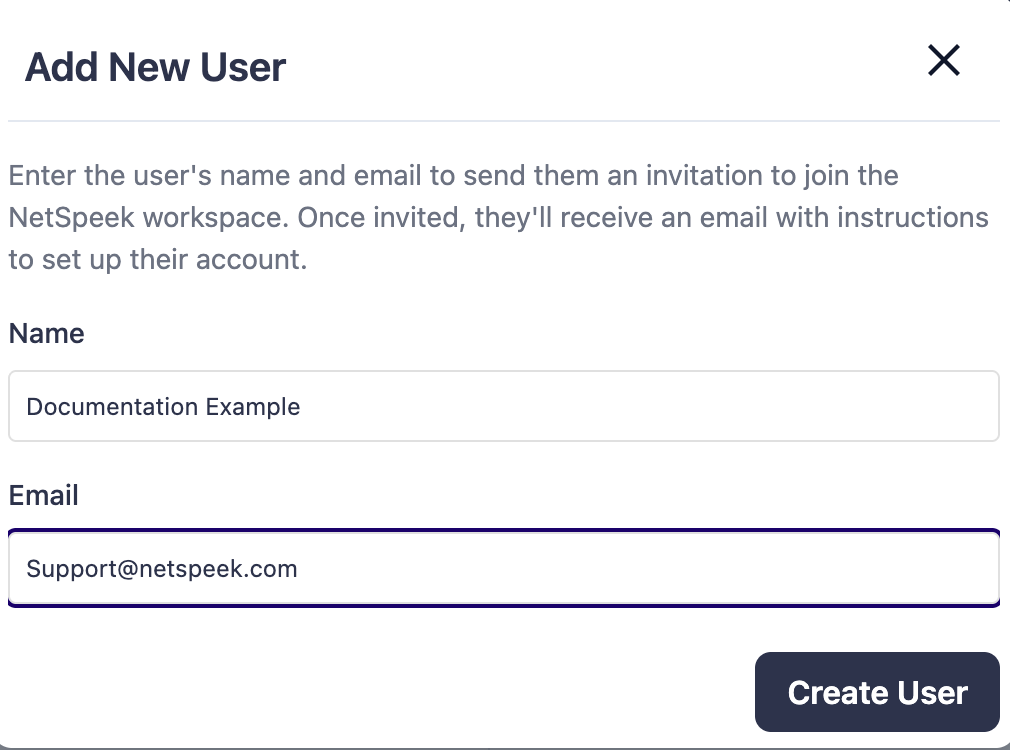
The Add User workflow includes the steps depicted in the following images.
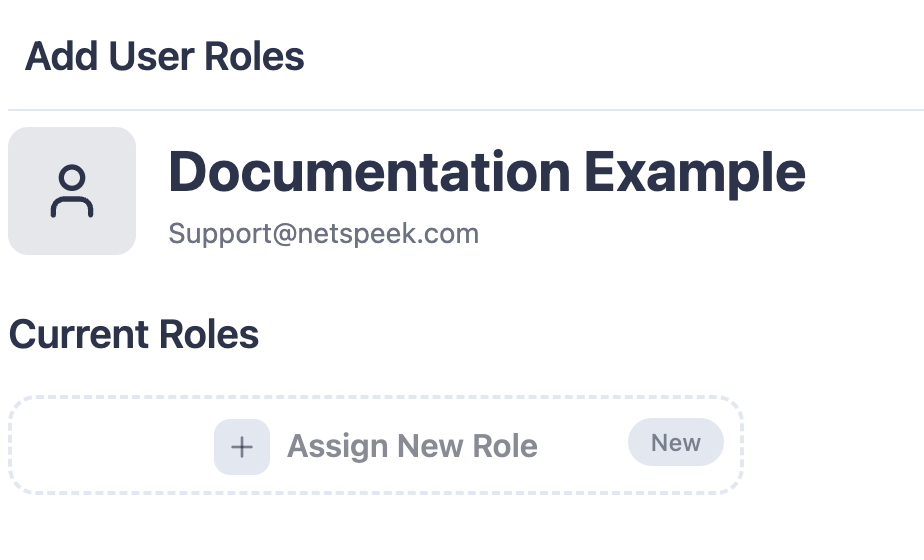
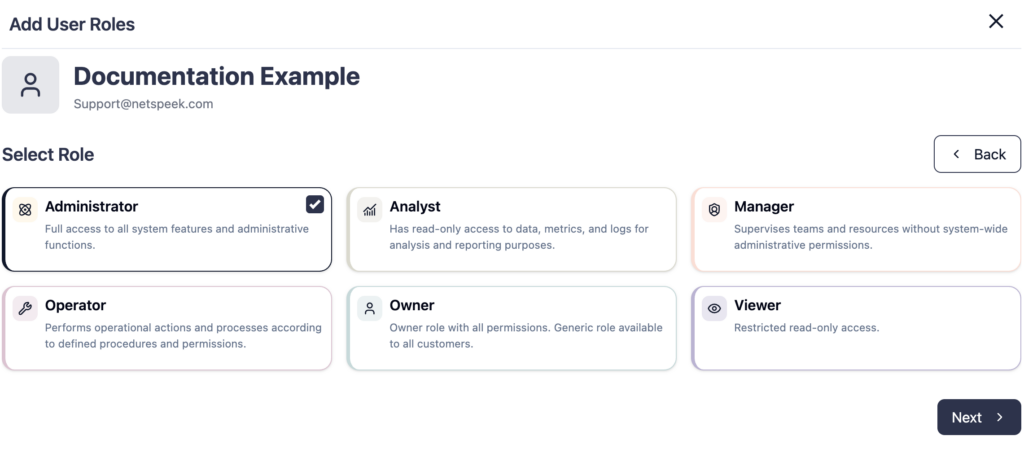
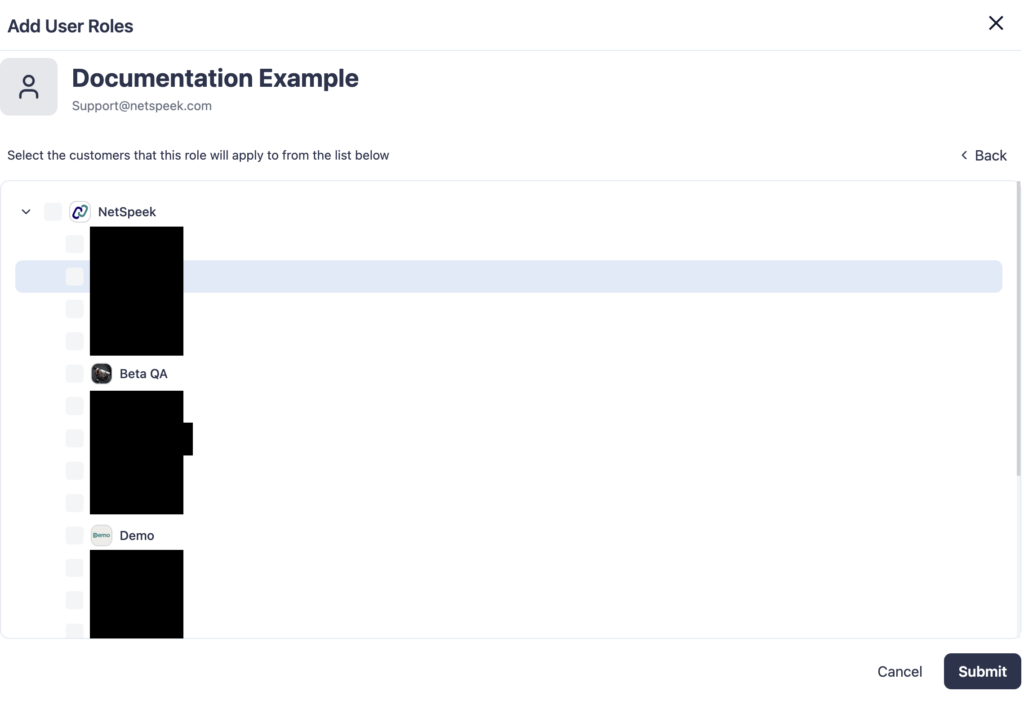
NetSpeek is the primary tenant, and subtenants include Beta QA and Demo3. Sub-Tenant Management (Conditional)
Create or Edit a Sub-Tenant
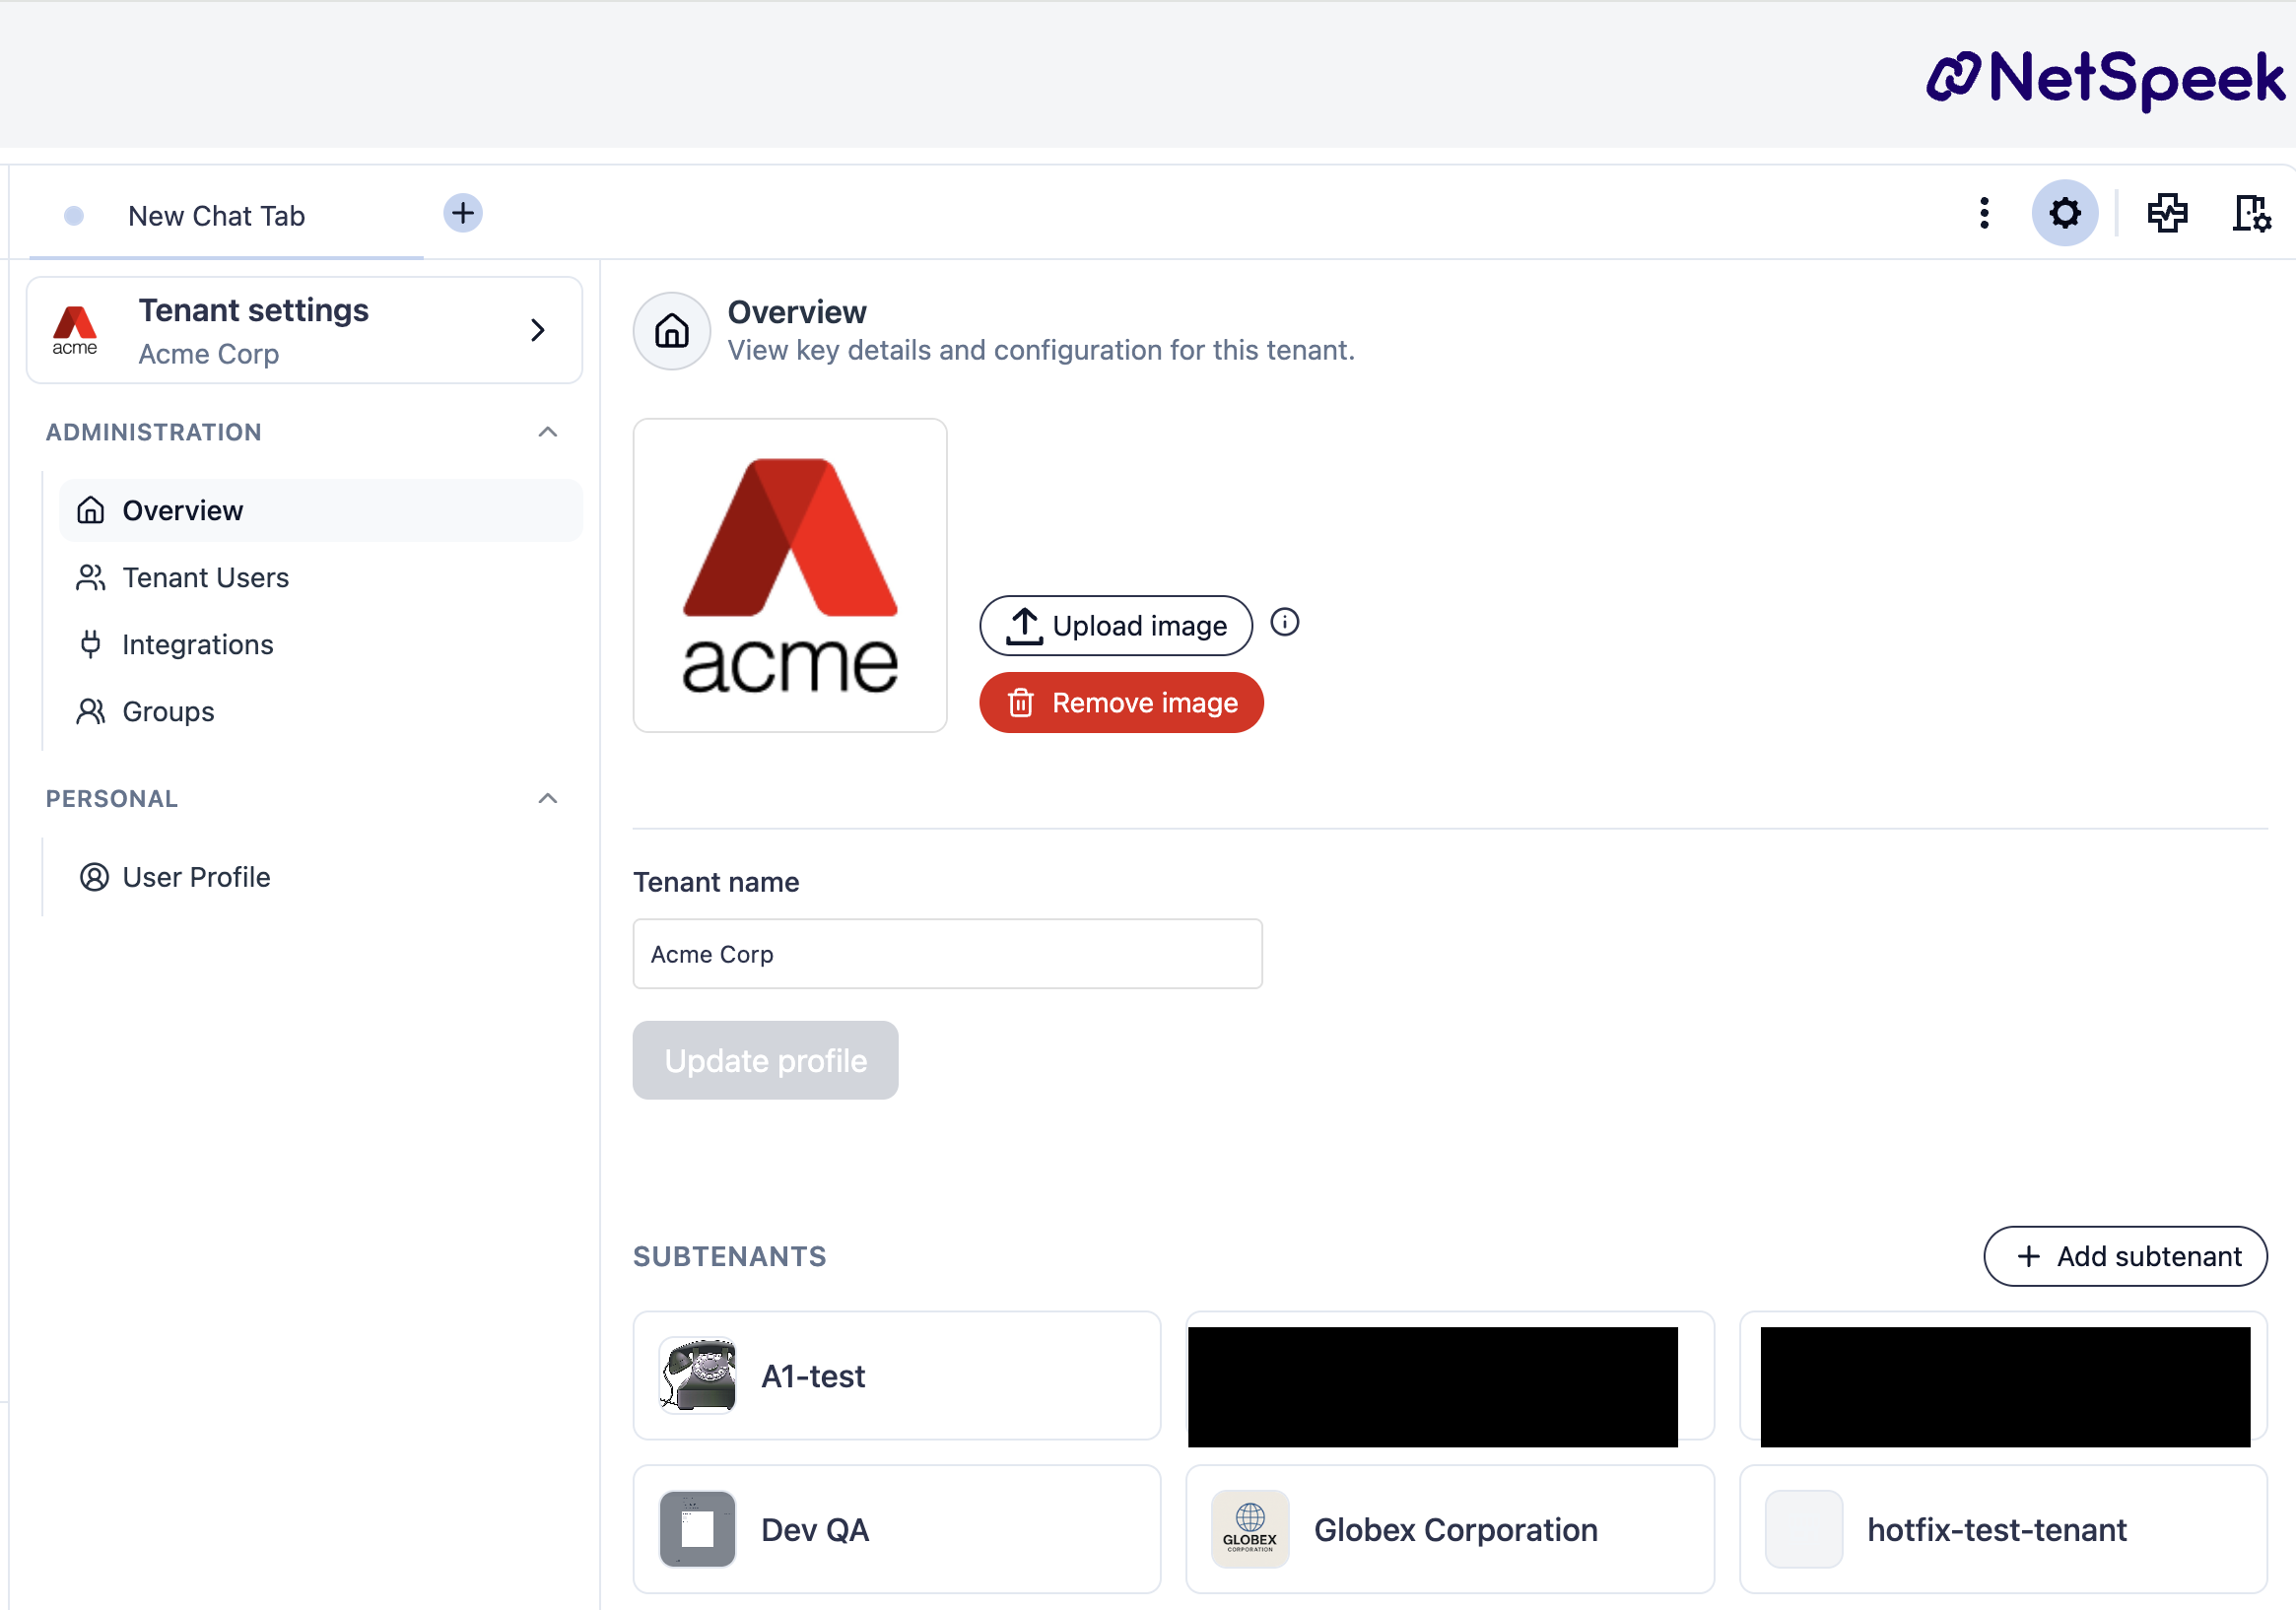
The intention of sub-tenants is to provide a method of logical separation between organizational units within a NetSpeek subscriber account. For example, a company with separate brands operating independently, or a company merging with another, may wish to have brand-based groupings of rooms/devices within a subtenant, or to provide the same user with varying levels of access (via RBAC) to different subtenants. Contact your NetSpeek representative to discuss this tenant design consideration if of interest.
- Navigate to Tenant Management > Overview.
- Click “Add subtenant” to create a new one, or select an existing subtenant to edit its name or profile image.
4. Create / Manage Integrations
Integrations are the basis for Lena’s orchestration of devices added to your NetSpeek tenant via the Room Canvas. There are three methods of integration – all of these are created and managed via the Integrations tab of Tenant Management shown below.
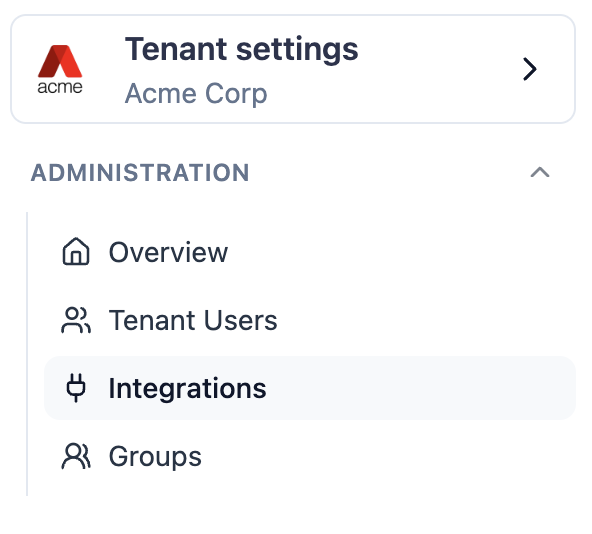
The three integration methods are:
- Cloud-to-Cloud
- The NetSpeek cloud connects to another vendor’s cloud. The only on-premise equipment is the orchestrated equipment itself.
- Edge Direct
- An on-premise NetSpeek Edge VM connects directly to an orchestrated device – for example, the Edge VM sends API commands directly to a display at the display’s LAN-local IP address.
- Edge Sub-Integration
- The NetSpeek Edge VM relays commands through an intermediate system to reach an orchestrated device. For example, the NetSpeek Windows Runtime Service (NWRS) communication path is: Edge VM –> NWRS installed on PC –> Orchestrated Windows OS. The intermediate system in this example is the NWRS developed by NetSpeek, though there are integrations where the hardware vendor provides an infrastructure component comparable to how the NetSpeek Edge VM functions.
To see the full list of currently-available NetSpeek integrations, visit:
Note
Configuring integrations is mandatory to enable device orchestration and control.
5. Set Up Locations
Define your organization’s real-world structure, from global offices to individual rooms, to reflect where devices are physically located.
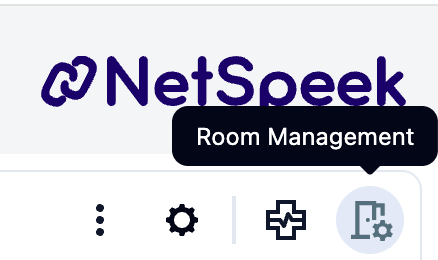
- Navigate to Room Management – this is a room configuration icon found in the upper right of the portal interface, beneath the NetSpeek logo.
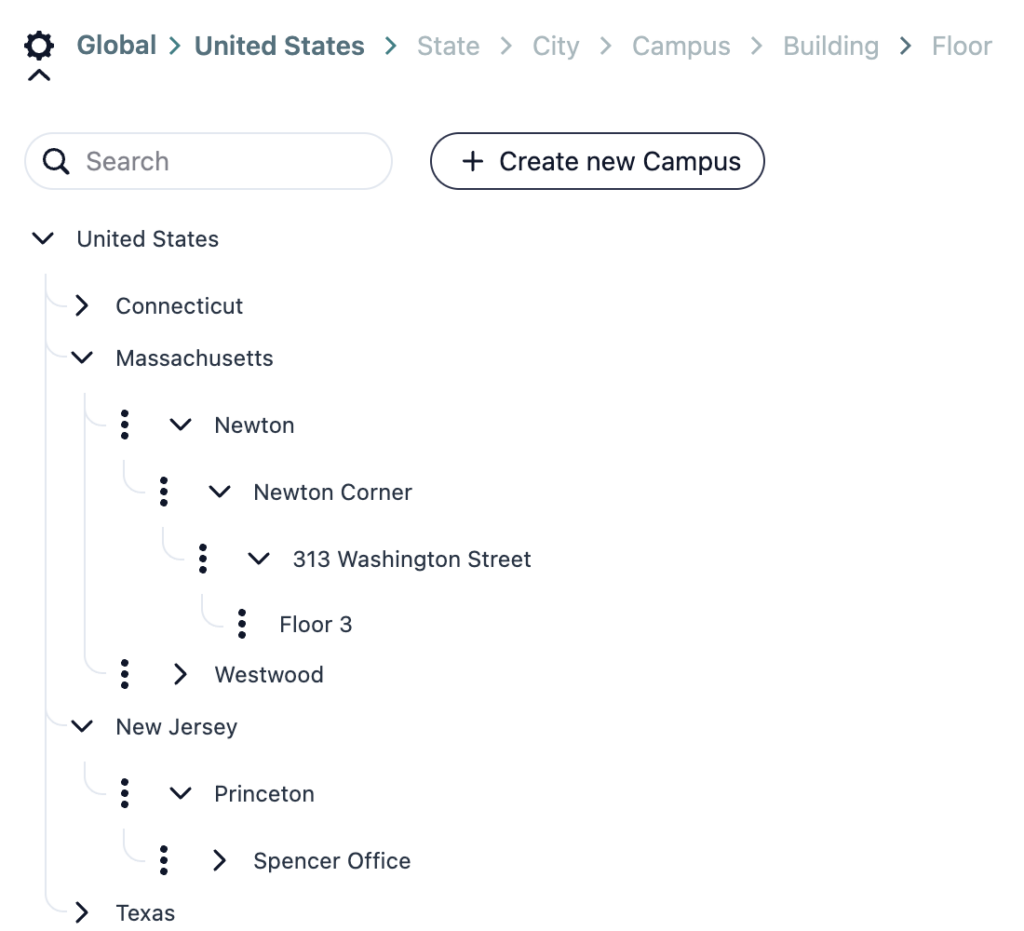
- Click Manage Locations – this is a cog icon in the middle area of the screen, to the left of the word “Global” in the hierarchy definition.
- Click Create New Campus to define a new site not currently present in your tenant.
- Define your location hierarchy. Start by creating a campus to set up your organization’s hierarchy, and assign the campus to a geographic location (Country → State → City). This will add that campus (and its Country/State/City location information) to the location tree chart. Then, use the tree chart to add Buildings, Floors, and Rooms in order to define your endpoint locations. The hierarchy is:
Country → State → City → Campus → Building → Floor → Room - Click the > to expand or close a section of the hierarchy. Click the three dots to perform configuration actions, such as adding, deleting, or renaming locations.

Note
Maintaining an accurate location hierarchy is essential for diagnostics, automation, device control, and other platform functions.
Note that Campus, Building, and Floor information is user-editable, but Country, State, and City information is managed by NetSpeek. If you believe you have found an error in the geography database, contact NetSpeek Support to report it. If the City you wish to use is not present, choose the nearest City present in the database in order to create your hierarchy, and report the issue to NetSpeek Support.
6. Add Devices & Configure Connections
Add your devices to the platform and map their physical and logical connections to accurately represent your real-world setup.
Enter the Room Canvas
- Navigate to Room Management.
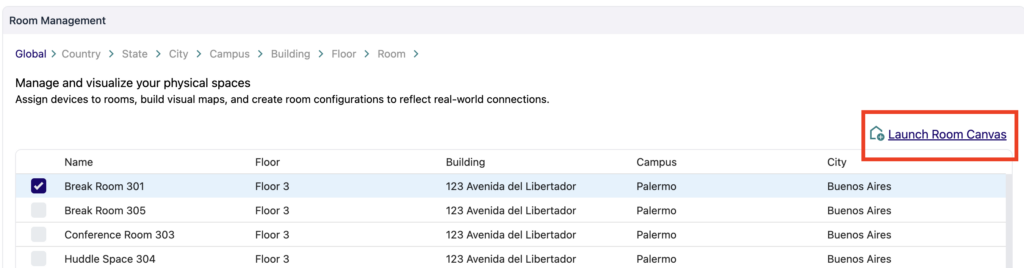
- Use the Location breadcrumb filter at the top to identify the room you would like to work on.
- Once you select the room you would like to setup, click on the Launch Room Canvas link to open the digital map of your rooms.
Add Devices
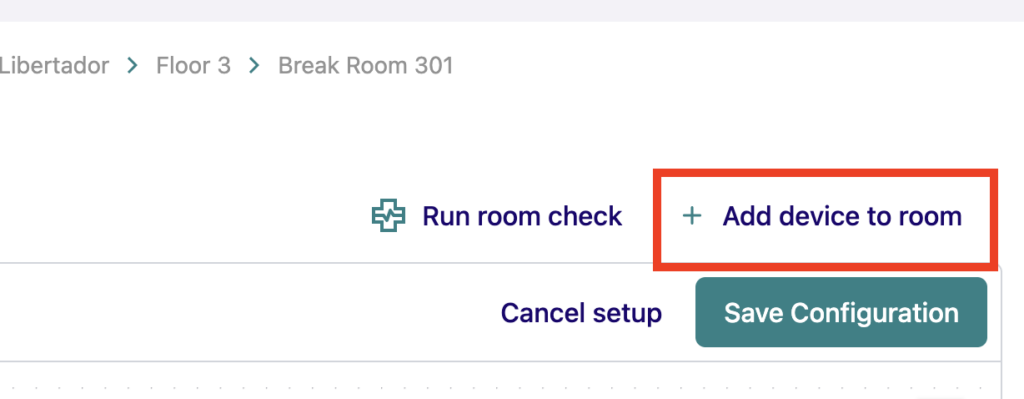
- Click Add device to room.
- Enter the information according to the prompt, such as:
- Model
- Manufacturer
- Serial Number
- Integration Type
- Username/Password/IP address/MAC address or other vendor specific information
- Note that the data required will vary based on the device/integration type – see details about your specific device type in its integration guide from the list here.
- Once saved, devices appear on the canvas.
Connect Devices
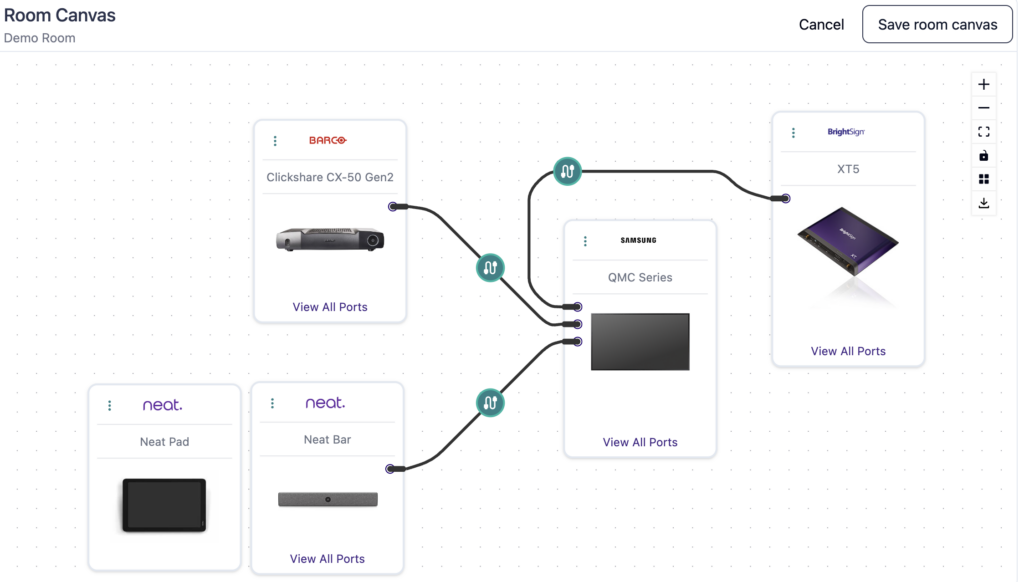
- Once a device has been placed on the Canvas, you will see the list of device connection sources.
- Use drag-and-drop to map physical connections (e.g., Device A’s HDMI1 output to Device B’s HDMI 2 input).
- Click Save all changes when all source connections are complete.
Note
It is mandatory to define how each device’s sources are connected so Lena can orchestrate them correctly. Without this, the room/devices cannot be properly controlled.
You can edit, move, configure connections, or delete devices at any time.
7. Define Target States / Room Checks (Optional but Strongly Recommended)
Define each room’s intended use (e.g., meetings, presentations, or digital signage) by selecting the appropriate device actions required to support that use. Lena uses these device action settings as the baseline for the room’s purpose and then matches them to assess and ensure room readiness.
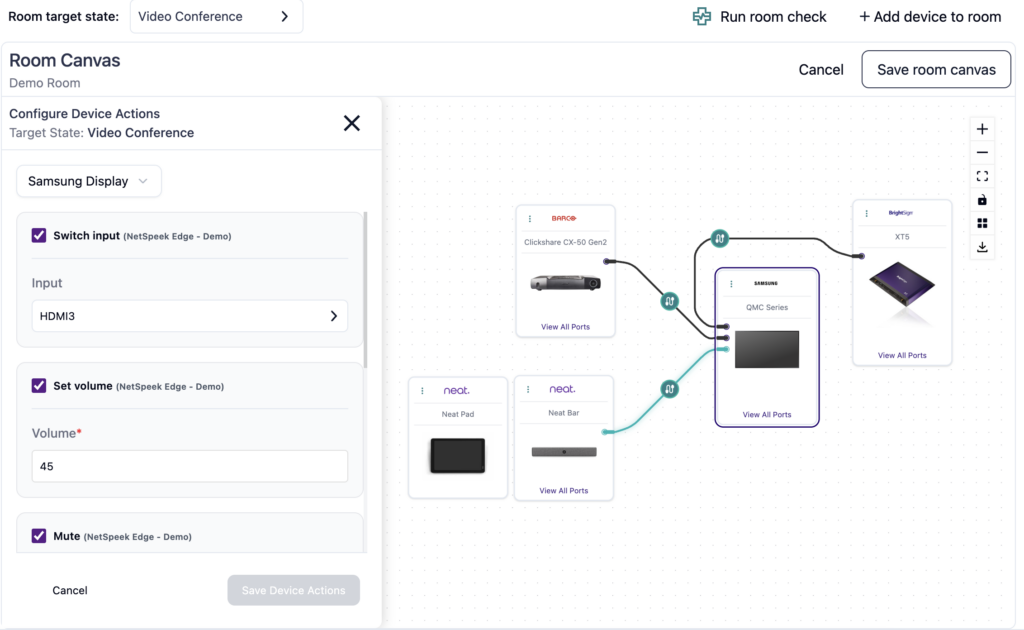
- Use the Room Target State dropdown and click + Create new state to create a room persona (e.g., Presentation, Signage, Meeting).
- Select devices, and configure desired device settings for the persona such as:
- Power actions (e.g., on/off)
- Audio levels (e.g., mute, unmute, set volume to 50)
- Input sources (e.g., HDMI 1)
- Connect / disconnect test call to UC platform
- Other device-specific configuration parameters or commands
- Name the target state (e.g., Videoconference).
- Click Save Device Actions.
Note
With a target state defined, Lena can verify room readiness with a Room Check to ensure the room is correctly configured for its intended use. Room Checks can be initiated manually from the Room Canvas, or scheduled to occur automatically within the Room Checks interface.
If target states are not defined and created, Lena will be unable to conduct Room Checks.
8. Schedule Room Checks (Optional but Strongly Recommended)
After defining Target States via a Room Canvas, you can schedule Room Checks to re-occur on a schedule you set. Commonly, for example, a Room Check will occur prior to the start of the workday day to ensure equipment is functioning as expected. Note that different Room Checks can occur at different times – for example, the same room might be used for videoconferencing on Monday, presentations on Tuesday, digital signage on Wednesday, powered off over the weekend, etc.

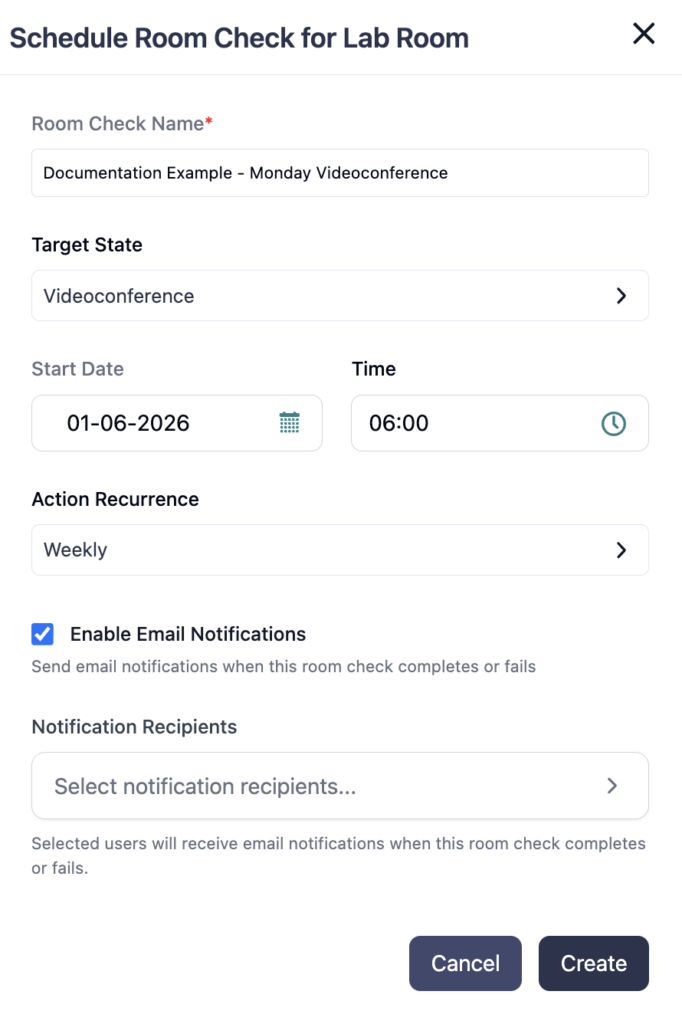
The configuration interface for Room Checks allows specifying the desired parameters – all configured Target States for the Room are shown in a list to choose from:
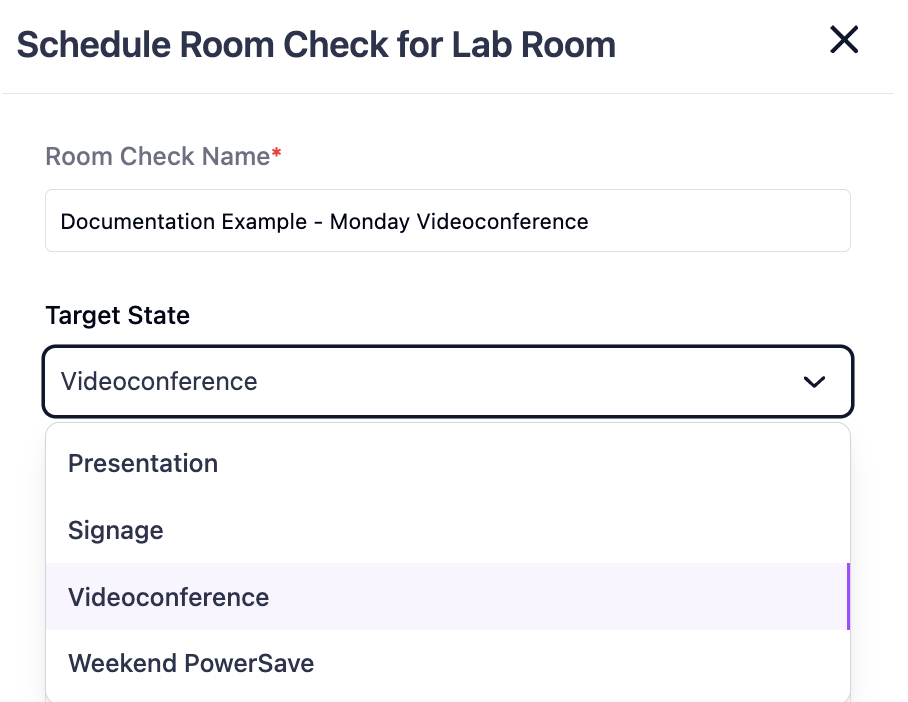
You can then specify the remaining configurations – when the Room Check should run, if it should continue on a recurrence, and users to be notified by email of Room Check results.
Navigating the Platform
Tenant Selector
Located in the top-left of the portal, the tenant selector dropdown allows switching between tenants/subtenants.
- Selecting a subtenant switches to showing only that subtenant’s contents and configuration.
- To leave a subtenant and return to the primary tenant, click the X in the tenant selector dropdown.

Note
All information displayed in the console area is scoped to the currently selected tenant.
Top-Left Navigation
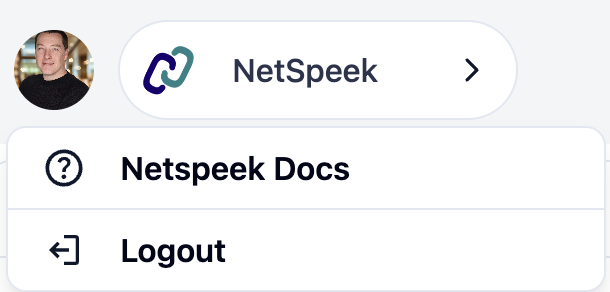
In the top-left corner, click your profile picture or first initial to visit NetSpeek Docs (this site) or logout.
Top-Right Navigation
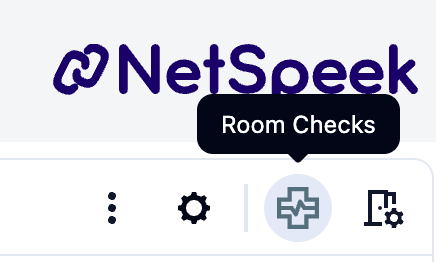
In the top-right corner, click the icons to perform functions discussed previously (access Room Management, or Tenant Settings), and to use Room Checks to schedule future checks or view reports from past checks, and the three dots to close all open chat tabs within the Console area.
Console Area
The Lena Console is a dynamic, flexible workspace in the web portal interface.
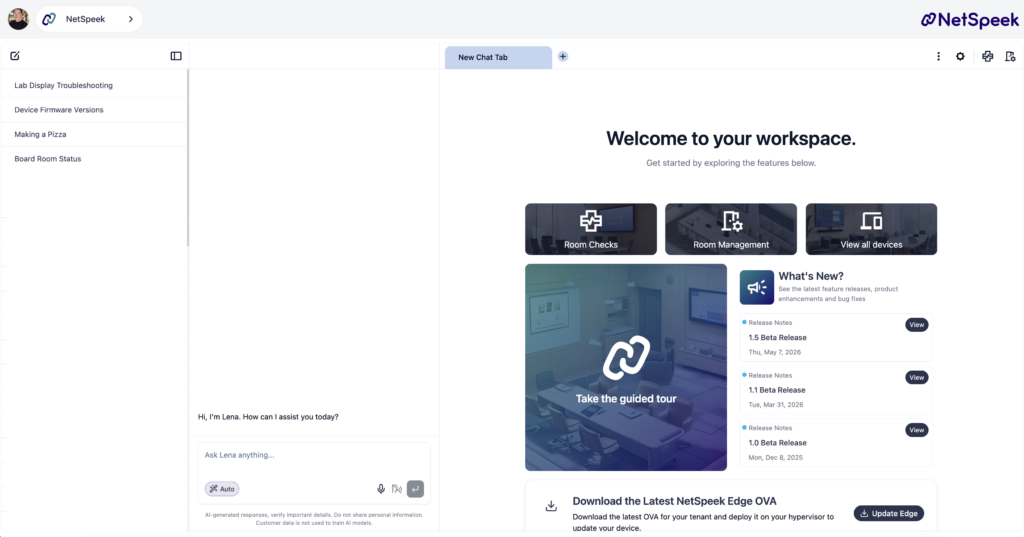
Access the Console by clicking the + sign to open a new Chat tab. Within the console you can:
- Chat with Lena – Ask questions, orchestrate rooms, and access previous chats from the list on the left.
- Navigate to functional areas – Use quick links to access common functions
- Read release notes – See what’s in recent updates to the platform
- Replay the Guided Tour – Restart the guided walkthrough (also shown to each user at their first login)
- Download the Edge VM – Get the .ova file for deployment
Note
Each tab in the Lena Console represents an individual chat in Lena Chat. Switching between tabs allows you to move between different conversations without losing context.
Lena Chat
Lena Chat appears on the left and mid-left panels – you can expand/collapse the chat history sidebar to provide more screen area to other functions when chat history is not needed.
You can use Chat to do various activities, including but not limited to:
- Ask environment-specific questions about your devices
- Troubleshoot devices
- Access manuals and other vendor documentation
- Run commands (e.g., restart device, get status)
- If you ask Lena to do something she can’t do, she’ll tell you – so feel free to experiment.
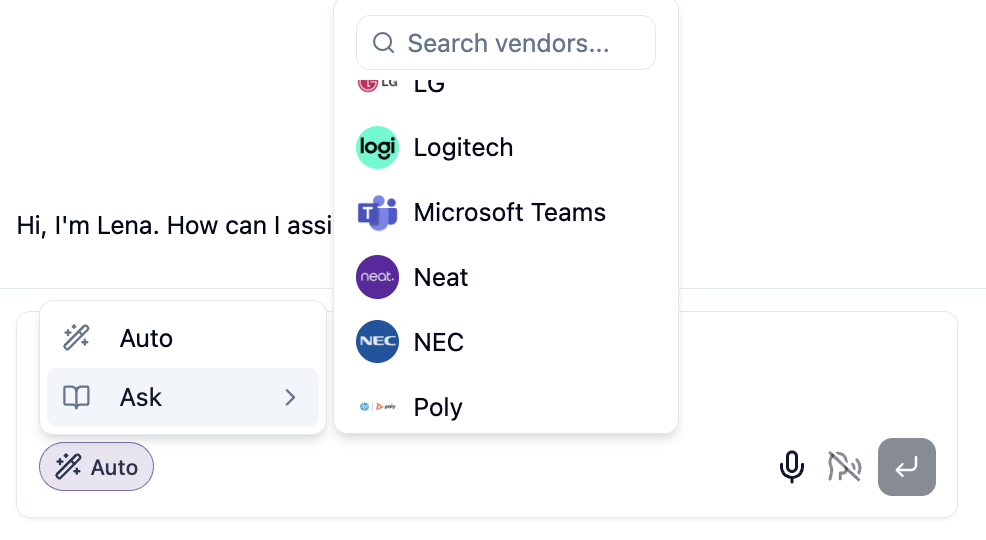
Ask Mode
Activate Ask Mode (above the message bar) to route requests directly to a specific manufacturer agent. Each agent is trained to handle questions within their domain, allowing for faster vendor-specific responses. By selecting the right agent before sending your message, you give Lena the context needed to streamline the conversation – for example, if a model name or other information is used by multiple vendors, Lena does not have to clarify which vendor you’re inquiring about.
Support
If you run into any issues during onboarding or have questions, contact NetSpeek Support at support@netspeek.com.